How to do a Levitation Photo

A levitation photo can add a bit of magic to your repertoire! For me, a bit of fine art photography is a nice break from doing regular clean portraits.  This is how I started out doing photography! And it is fun to experiment with.  For this example, I went out early in the morning (which is just a terrible idea for a night person like myself) and took a photo rather quickly.  Since I knew what I wanted to do with this photo it was easy to set up.  I wanted to do a dream like image where I was sleeping and levitating. So, I set up my 3 chairs with my pillow on one end.  I used live view on my camera, set my focus and set the self-timer.  Then I took about 4 photos at a time. Here is my original photo with the chairs:

Levitation image, Callihan photography, columbus, Indiana

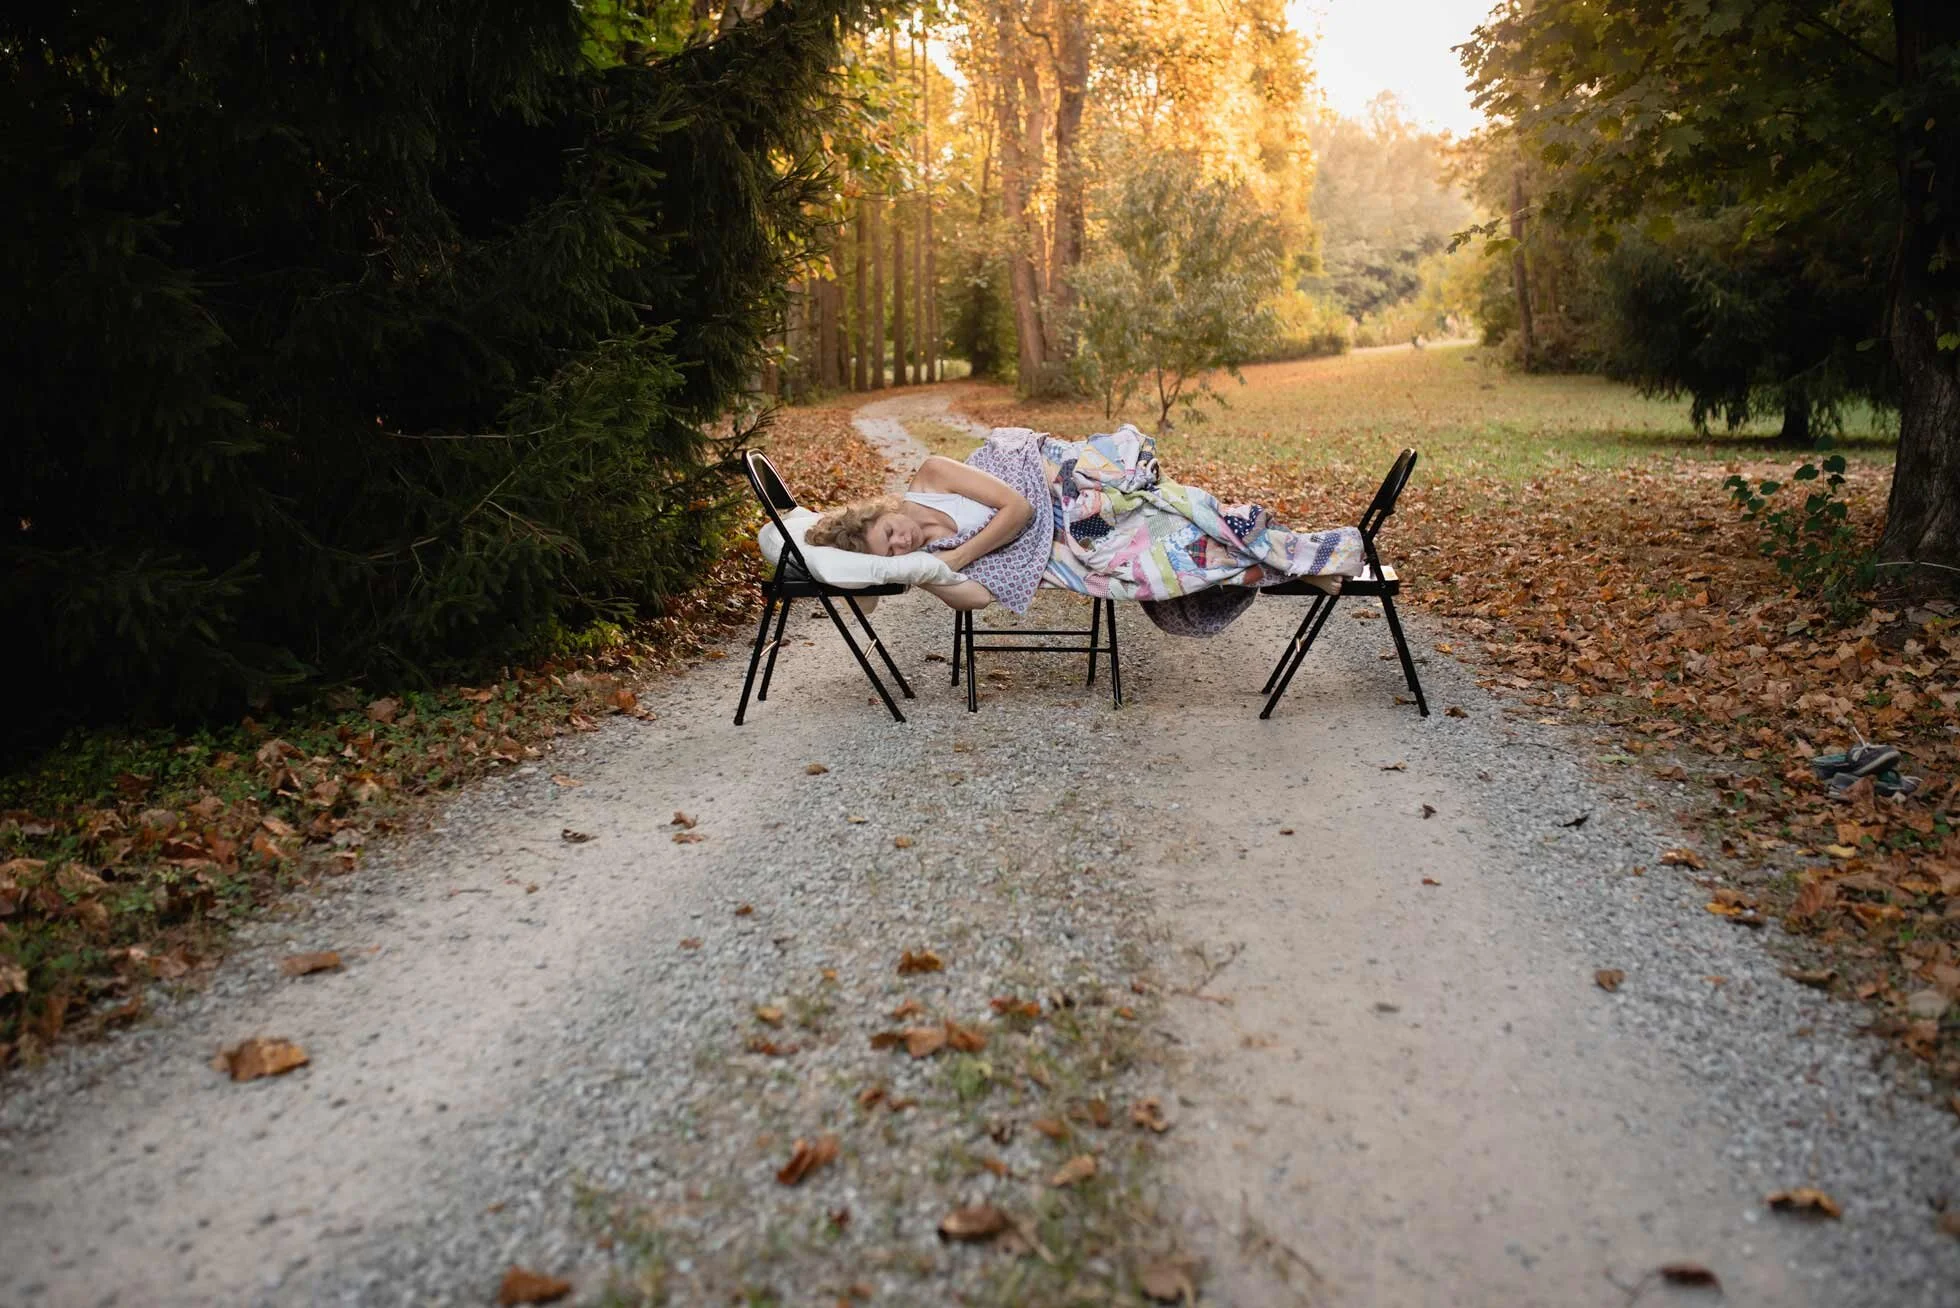
Then I took a photo of my pillow.  And then I took a photo of the scene without the chairs.  I made my basic edits in light room and cleaned up things like my shoes sitting off to the side.  Then I brought my three pictures into Photoshop.

the road less traveled, callihan photography, columbus, IN
levitation pillow example, Columbus, IN, callihan photography

I then used the picture without the chairs as my base.  I then selected myself and the chairs and copy and pasted on a new layer. 

callihan photography, columbus, indiana fine art photography

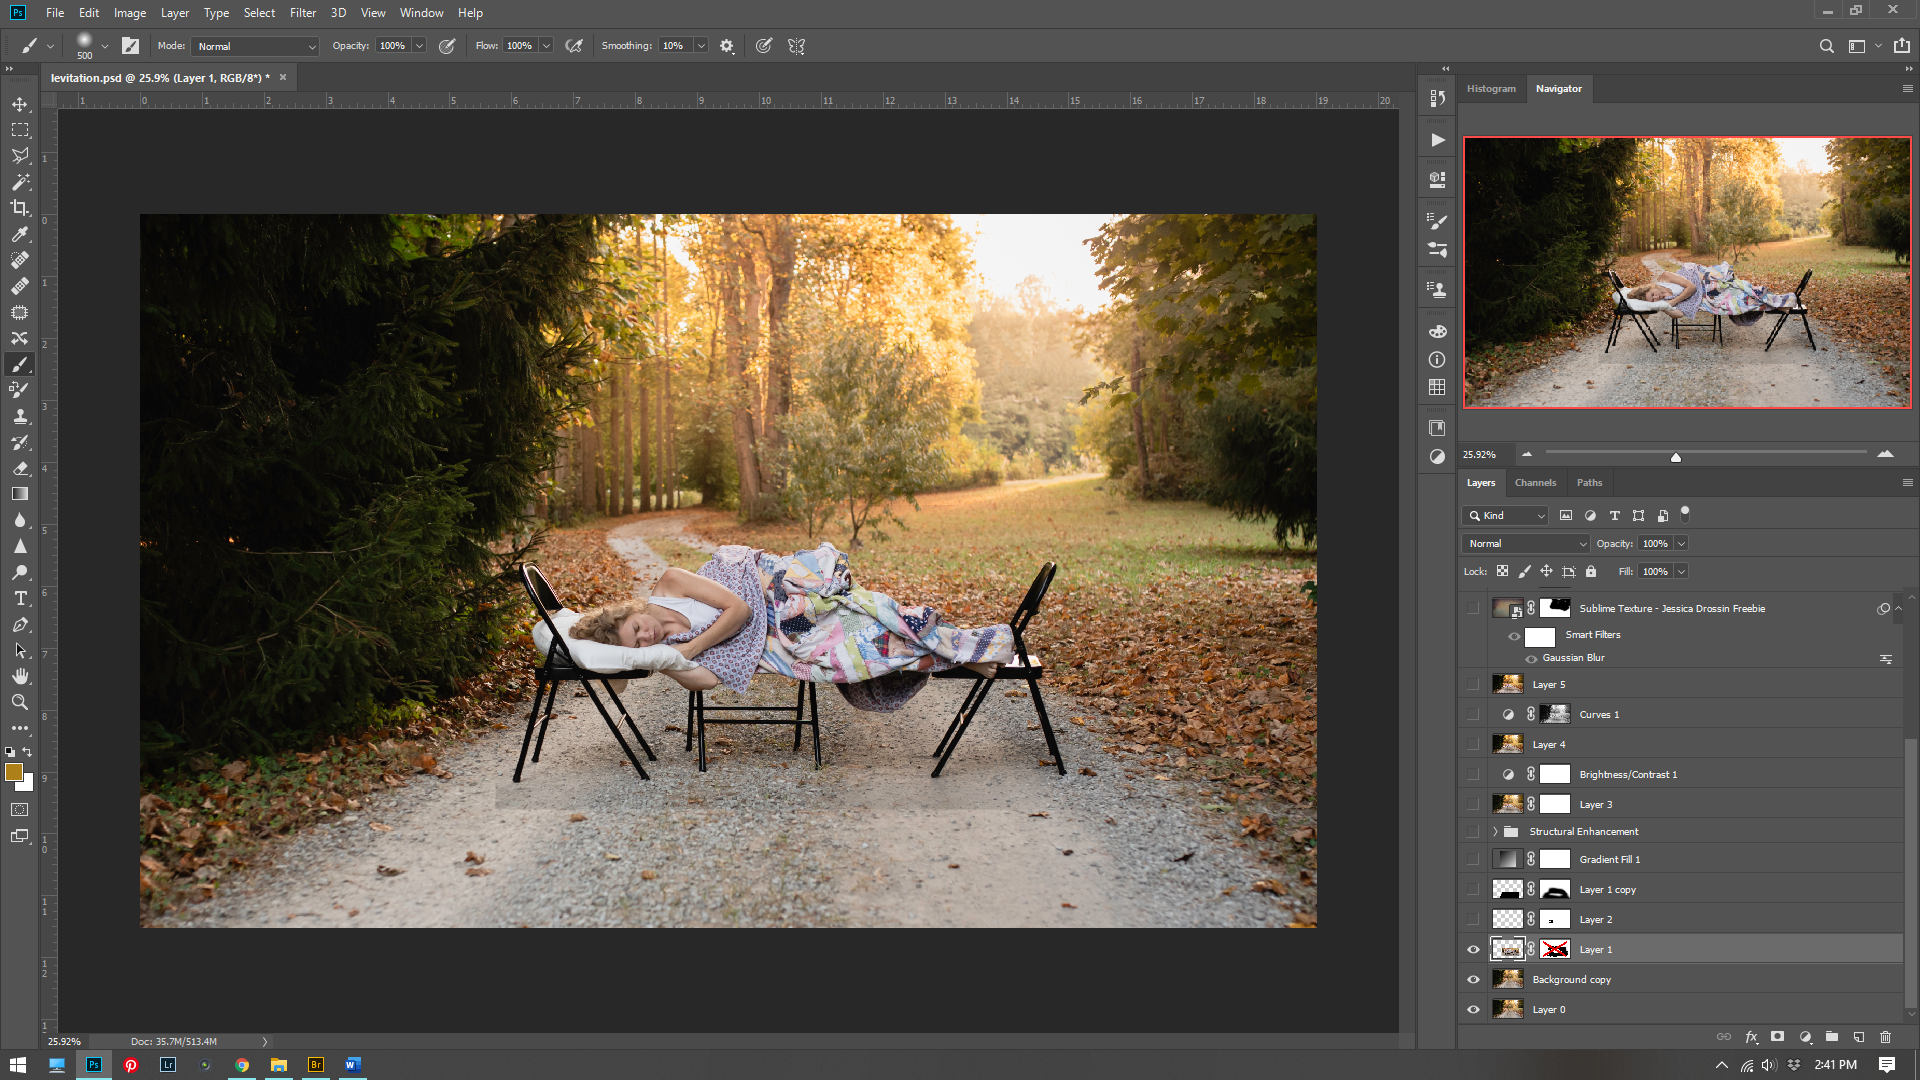
Using a hard brush, I removed the chairs by painting black on a white mask for that layer. I was then stuck with the chair cutting into my pillow.  So, I took the pillow from the other picture, selected it and pasted it on a new layer. I then used this layer to cover up the black chair on the pillow.

columbus, indiana, callihan photography, screen shot

At this point I needed to make the shadow underneath me.  Without the shadow I just looked weirdly lying on the ground.  This is where you need to take note of your light.  Is it soft or hard? Do you have a hard shadow or a soft one? Is there a multiple light source or just one?  As you can see in my picture with the chairs, I have a very soft faint shadow underneath me and I need to recreate that. So, I then made a duplicate layer of myself (without the chairs) and hit CTRL+M for the curves layer.  I blacked it out by pulling the highlights all the way down.  I then used gaussian blur to blur the shadow even more.  Then by using the short cut CTRL+T to transform (and simultaneously clicking the mouse on a corner square and holding down the CTRL key) I skewed the perspective of my shadow to flatten it a bit more.  I then placed it underneath my floating body and set my opacity to 45%.  (The 45% is just what I thought looked about right).  

callihan photography, screen shot, columbus, indiana photographer

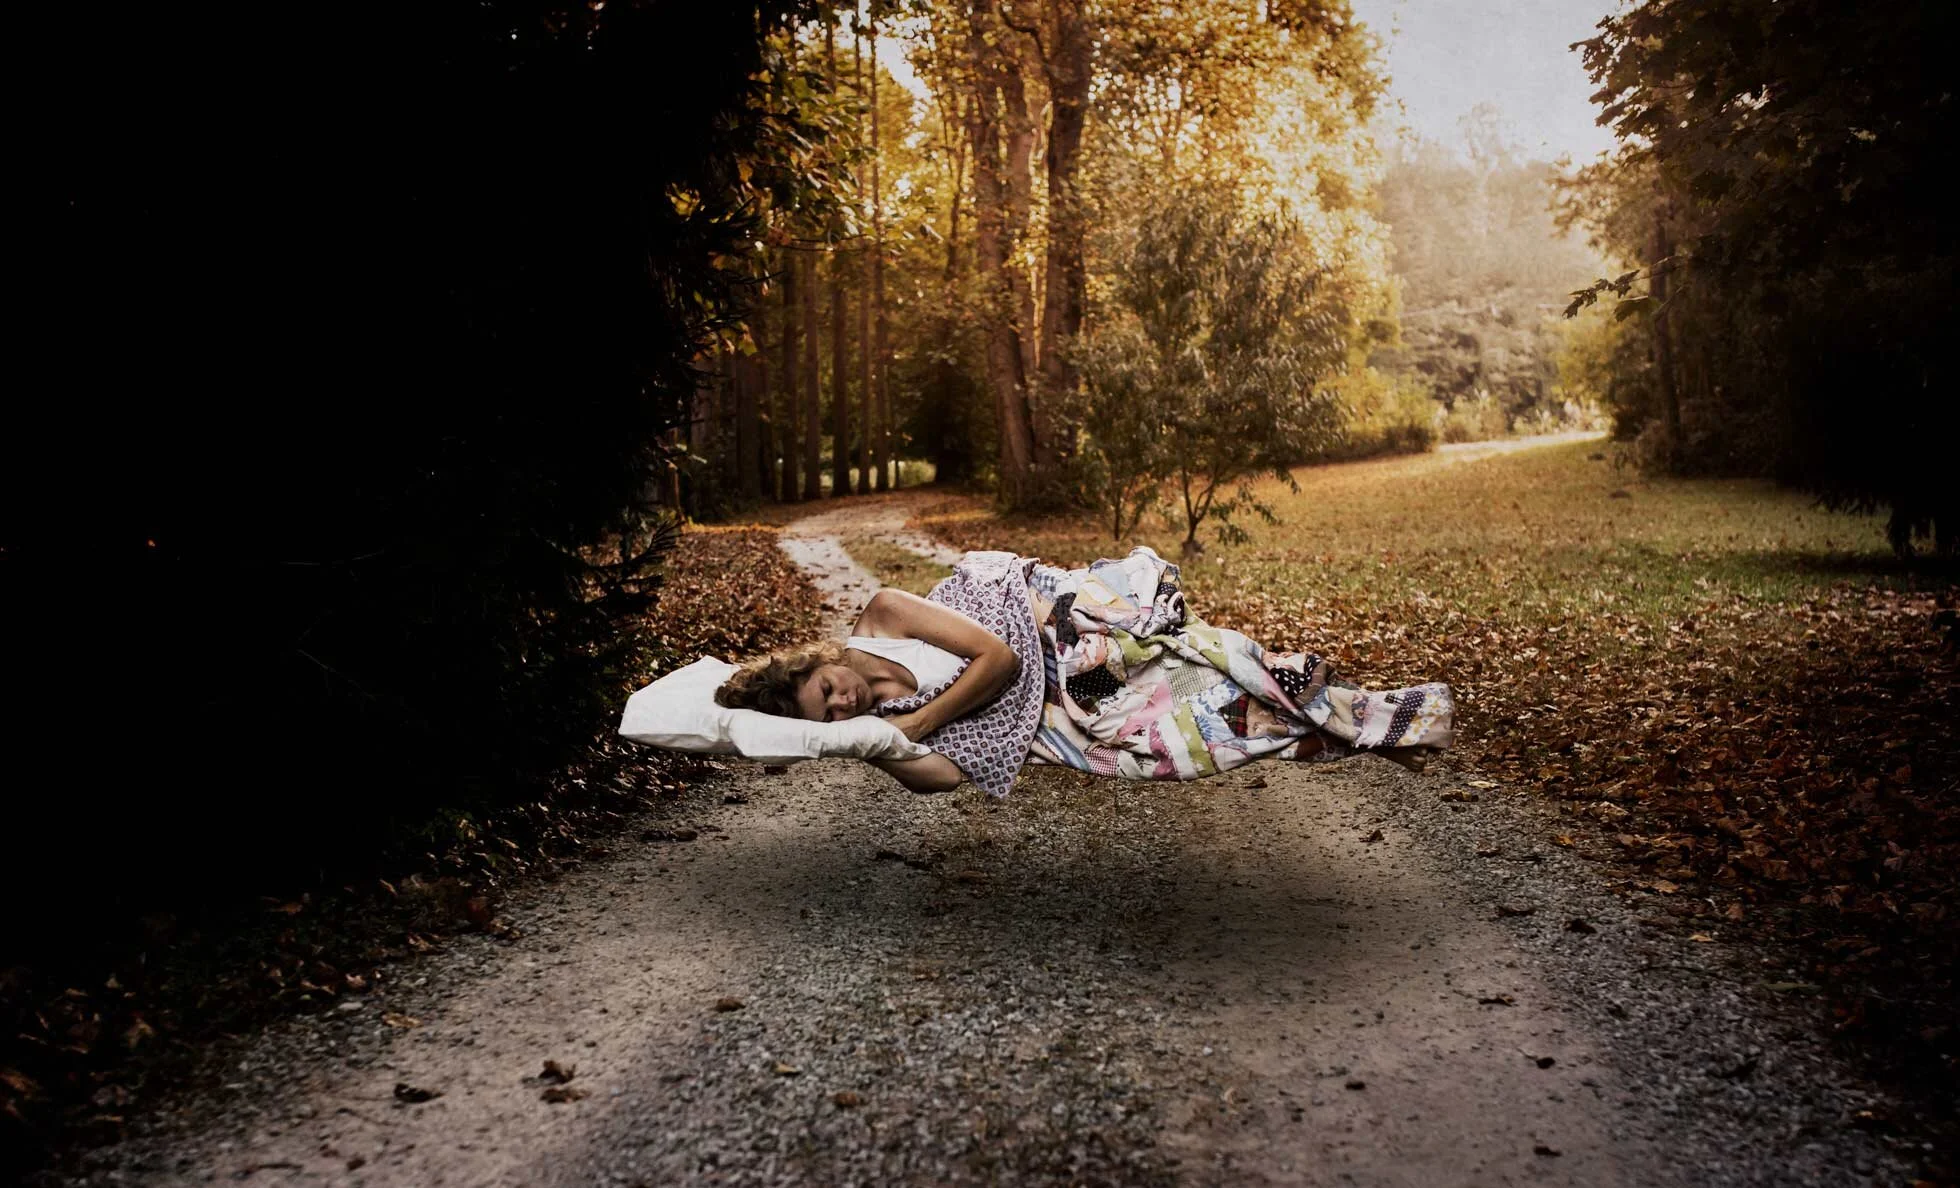
At this point it is all artistic license. I enhanced the light to make it a bit hazier. I did this by adding a radial gradient layer. I increased the contrast. I added a texture from I bought from Jessica Drossin. Then I thought it looked a little too yellow and intense and I wanted to give it a more painterly T.C. Steele tone to it.   So I added a hue/saturation layer. 

columbus, indiana photographer, callihan photography, Adobe Photoshop screen shot example

I then thought it looked a little dark so I added a curves layer adjustment.  Two more texture layers from Jessica Drossin to add that painterly texture and feel. (Sometimes adding a texture can make an image come together).  Then I added another Hue/saturation layer to tone some of the yellow out.  Here is my final image:

levitation photo, columbus indiana photographer. callihan photography

If you want to see more fine art images, I highly recommend taking a look at Brooke Shaden.  She does some amazing work! Thanks for reading!    

How to Add Fireflies to A Photo

Fireflies, lightning bugs, bioluminescent creatures of the night, (whatever you call them): they are fascinating creatures to catch and watch. Not to mention it is a staple of childhood! I remember staying up late and catching them as a child, and I love to watch my kids as they chase them all over the yard.  We used a pickle jar, and punched holes in the top of the lid.  It is easiest to catch them when they land on the ground!  They are hard to see, which is also part of the fun of catching them.  If you live in the Midwest, this is a MUST!  

Firefly catching, Columbus, Indiana, child photographer

However, in pictures they just don’t show up so well.  Not to mention it is not that easy to snap a shot when they are all lighting up.  In order to make that picture as magical as it is for your child you will need an overlay! That is how I have created these pictures. I used an overlay in photoshop and set the layer to SCREEN.

Columbus, IN photographer tutorial example

Then I hit ctrl/j to duplicate the layer as much as I want.  I use the shortcut ctrl/t to transform and adjust the size. Then I place them in varying areas and sizes to add depth and atmosphere. The closer they are to your camera the bigger and blurrier you will need to make them.  I have created my own shortcut in photoshop to add a Gaussian blur.  But you can get there by going to filter>blur> Gaussian blur, and then blur to your taste.  I also lowered the opacity on some to make them blend better.

Columbus, IN photographer, example for Gaussian Blur

Remember the rule of odds if you place them close together or in the jar. To read more about the rule of odds, go here. This adds visual interest and helps to move your eyes throughout the picture. 

Fireflies in the pickle jar, Columbus, Indiana, Midwest picture ideas

I have made this overlay available for download for free! I added some noise to the overlay, because chances are if you are out catching lightning bugs it is going to be very low light. I had to increase my ISO to a very high number in order to capture anything and keep my shutter speed reasonable. Make sure to set the overlay to SCREEN. I hope you enjoy it! Please let me know if you do! Please share your pictures with me!  I would love to see what everyone comes up with!


Download the Firefly overlay here.

Lightning bugs, Columbus, Indiana Family Photographer

Thanks for reading!


How To Do a Simple Composite

Here is my photograph that I am going to use to be the center of my composition.

Cabin, black and white picture for Photoshop Composite, Columbus, Indiana

I start out by using the quick selection tool to select the cabin and some of the ground. I then copy and paste it to a new document in Photoshop. (I just use a generic size and then extend my canvas with the crop tool).  Next step it is cleaning up the image.  You can use the erase tool, or you use a layer mask to tidy up those edges and get rid of anything extra the quick selection tool may have selected.

Photoshop edit, How to do a Composite, Columbus, IN

I then add more ground by selecting some from other pictures I took from the same shoot. Keep the edges of everything soft by using the blur tool or use a soft brush on a layer mask. Next, I add the sky and use a black and white layer to make everything black and white.  In this picture I used a cloud layer from Jessica Drossin’s Macabre skies and overlays.   However, you can use one of your own if you have one! To make sure the light is coming from the same direction in my clouds as it is in my cabin picture I flip the sky horizontally (which may not be necessary in your image) and then add a gradient fill layer (white to black) to change the light. I changed this to layer to soft light and adjusted the opacity to my liking (28%).

How to do a composite photoshop tutorial, Columbus, Indiana

Next, I added a smoke layer for the chimney mostly to add more drama! The smoke layers also come in Jessica Drossin’s Macabre Skies and overlays package. Then I add some more smoke/fog to the bottom using another overlay.  You can also create a fog brush. Phlearn has a very handy tutorial here.

Screen shot for tutorial example, smoke overlays, Photoshop tutorial, Columbus In

Then I notice the ground in front of the cabin is a little too bright.  So, I simply paint over it with a soft black brush (on a new layer).  I then set it to soft light and adjust the capacity to my liking (54%). Then I add a stamp visible layer (which is all the layers put into one new layer) by using the short cut Ctrl+Alt+shift+E (on a PC).  I then went to Filter + noise + add noise.  I selected Uniform at 1.05% - Then I set that layer to soft light and adjusted the opacity down to 38%. This just brings everything together in a more cohesive way.  

Photoshop Tutorial, how to do a composite, Callihan Photography, Blog, Columbus, Indiana

I then darkened part of the entire image and added contrast using dim the lights action (which comes with Jessica Drossin’s Macabre Skies Package).  This is a Gradient Map layer, but you could just add a brightness and contrast layer to do roughly the same thing. After this I just cleaned some of it up using the clone tool, and blurring parts of the image.  (Blurring can trick your eyes into thinking something belongs in the image when it doesn’t.) And then you have my final image here:  

Final Image, Callihan Photography, Columbus, Indiana