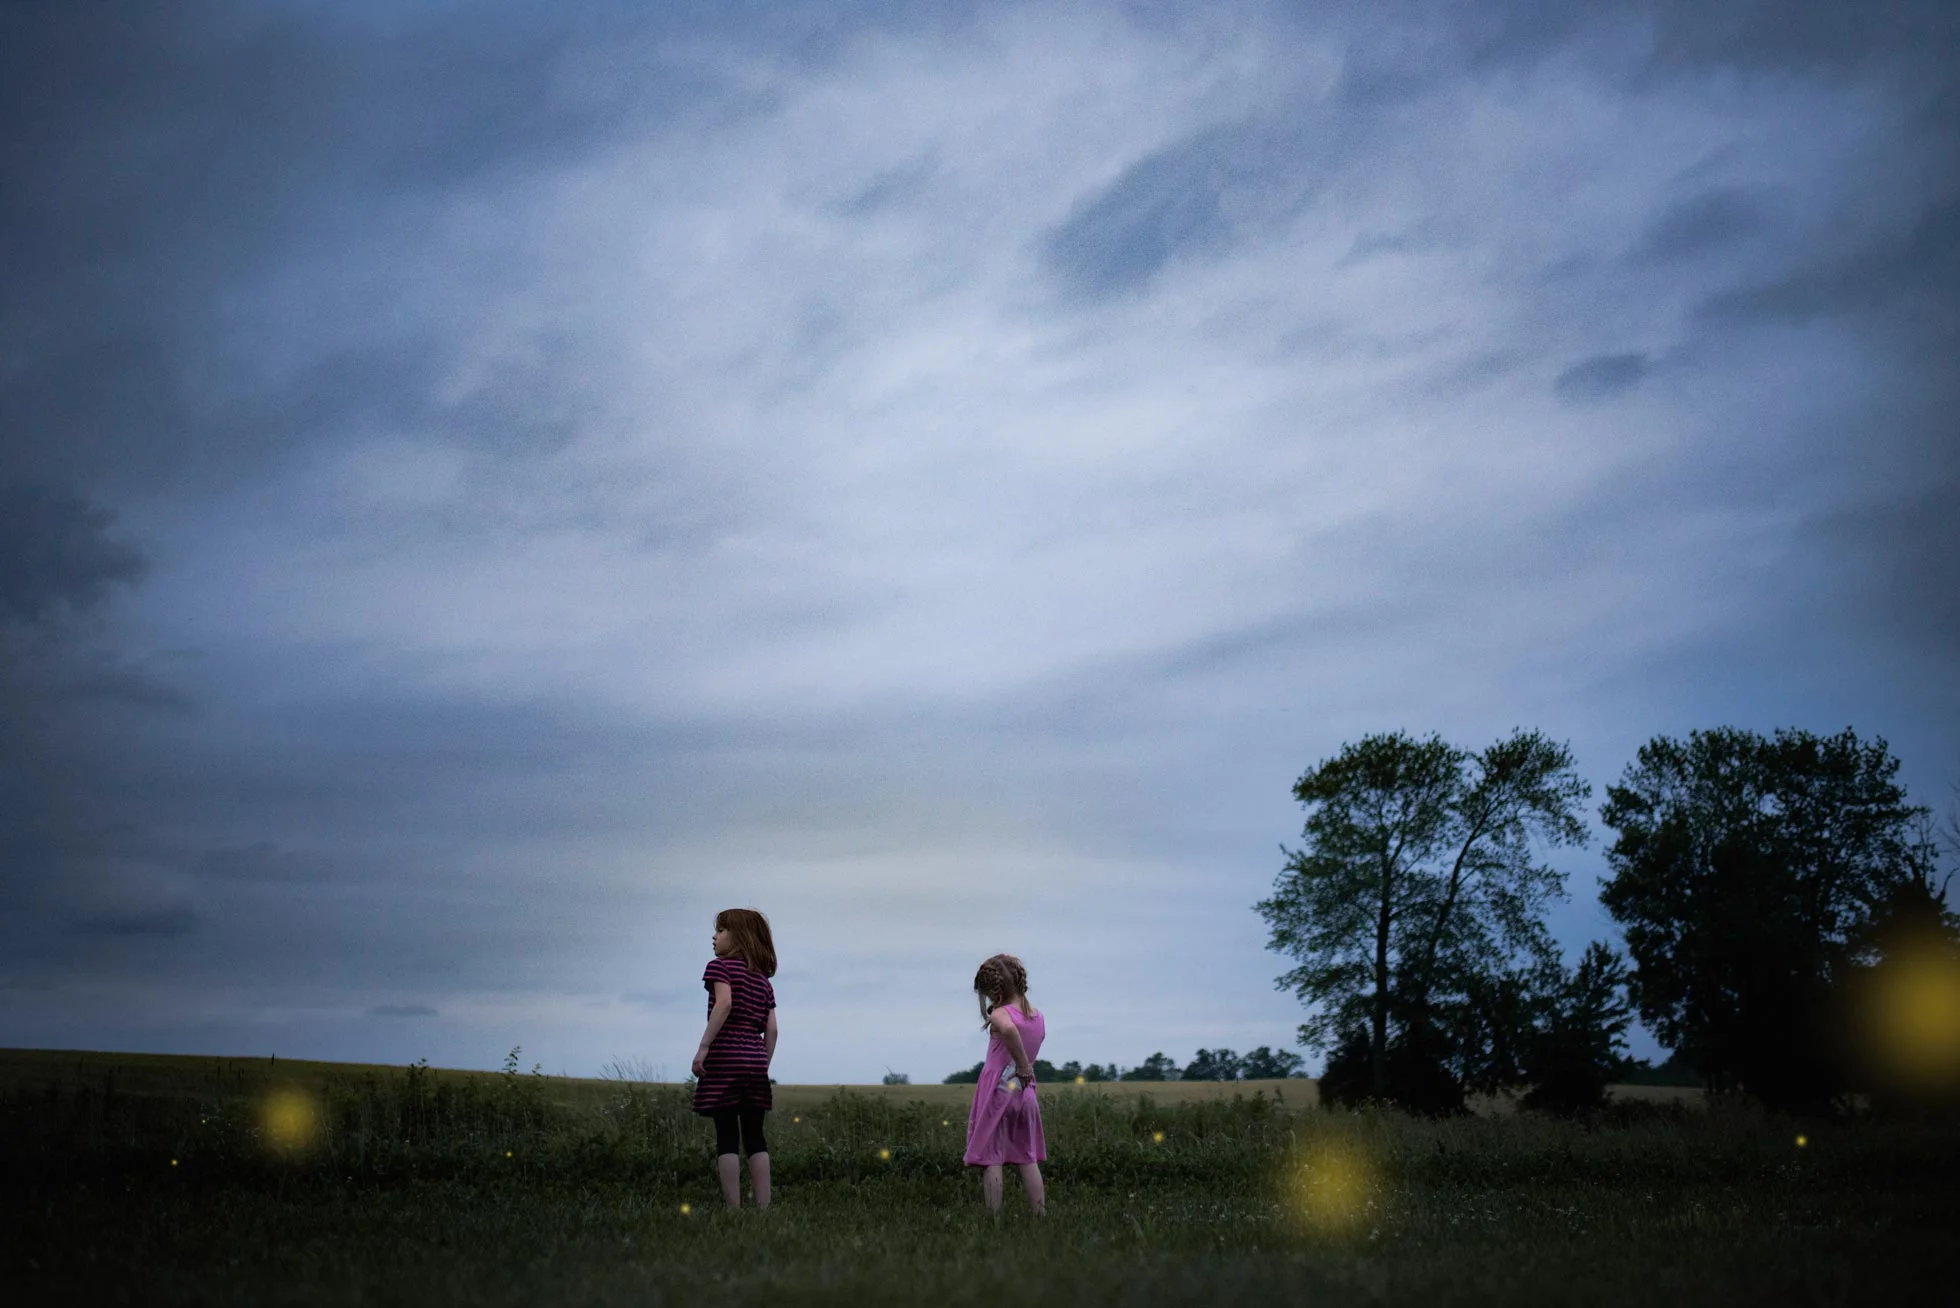
I have often found myself thinking, “this photo is really missing something”. I have developed my own little method of replacing skies, and you might do it this way too! Either way keep reading! You might ask, why would you bother replacing the sky? Because, there are just some pictures that look better with clouds! Some photos need a little extra punch. Whether the sky was clear that day (like in my example) or you’ve blown it out trying to expose for your subject, I will show you my own method for replacing that sky in Photoshop. Here are some before and after pictures where I have replaced the sky:

Before

After

Before

After

Before

After

Before

After
Now for my process. First, bring your photo into Photoshop. After making all your basic adjustments observe what kind of light is in your photo. Is it hard light? Is it soft? Is it back light, or side light or midday light? In this photo you can see that it is midday and very hard light. So obviously a back light sunset is not going to work for this photo. I chose a cloud overlay from Jessica Drossin, but you can even use your own if you want! Go ahead and bring the overlay into your work space on Photoshop. Place the clouds where you think they would look the best. Then turn off your new cloud overlay layer by clicking the eyeball next to the layer. Then go to channels. Select all your channels by clicking the RGB channel. Now drag your RGB channel to the little marching ants circle at the bottom right of your screen. Like this:
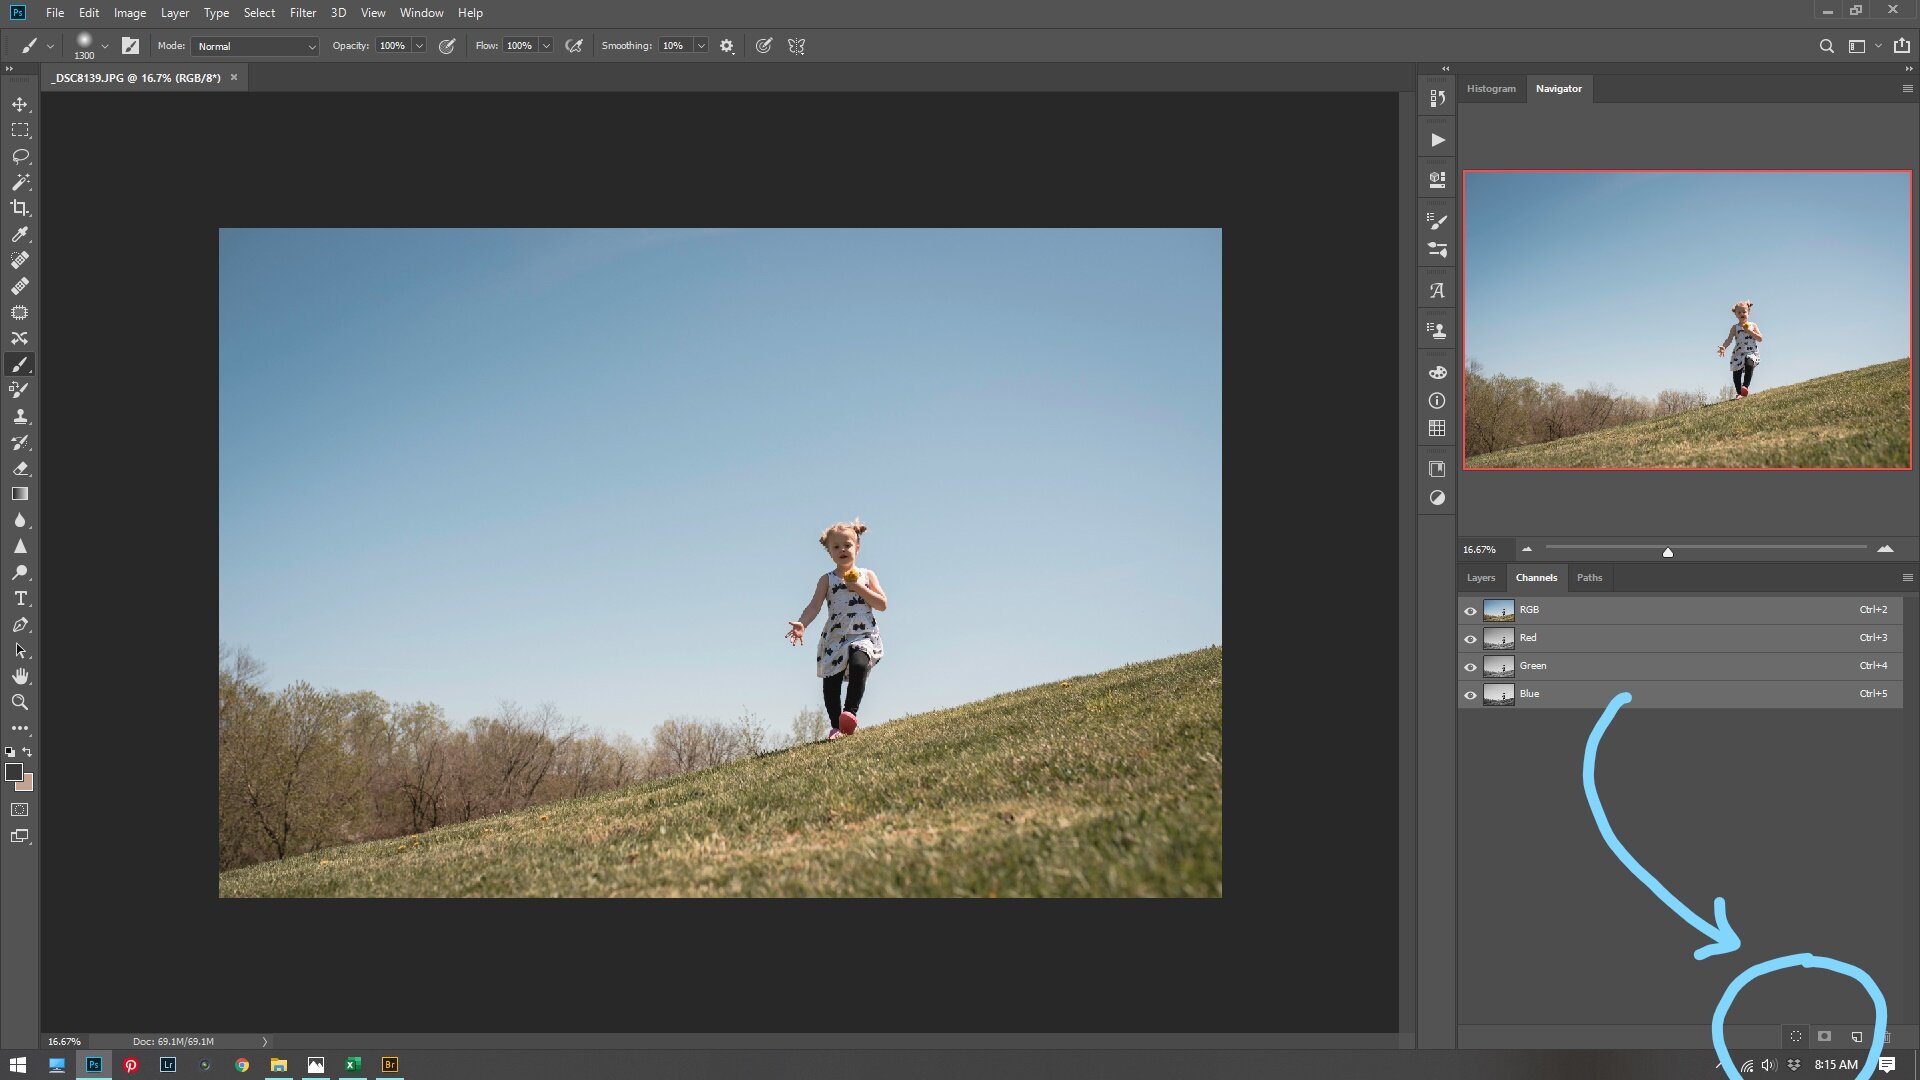

Now go back to your layers and turn back on your cloud overlay. Then click the masking tool to add a mask, seen here:

After that it should look something like this:

Now this is the part where you panic and say, “WHAT HAVE I DONE!!!!” It’s OK. Do not panic. It’s going to look a little weird. At this point, by masking the channels it has given you a good start. The rest is going to be by hand. Paint in your masking layer with a soft black brush at 100%. Make sure to cover all your subject’s skin and hair and the ground. Make sure there are no hard edges where your overlay ends. Use different opacity brushes to get around your subject if needed.

Next is just fine tuning. Sometimes the sky needs lightened. So, I usually lower the opacity to make it blend better. Sometimes, it will need more contrast. Sometimes you will need to darken your subject to make it look right. I usually use a curves adjustment layer to do this. In this example I felt like it needed more contrast. So, I added a contrast and vibrance layer (as I felt it was getting a little desaturated).

Here is the before and after of my example image:

Before

After
This WILL NOT WORK EVERY TIME. Sometimes you have a picture that you just can’t make this kind of selection. Or sometimes it just looks weird. Sometimes you need to try out a few different skies. Whatever the case is, this is the best way I know how to select around your subject and blend the sky into all those tree branches. Please give this a try!! And if you do, please share it with me!! I’d love to see what you’ve done! Thanks for reading!