One of my Favorite Lenses- Lensbaby Twist 60

The twist 60 is part of the Lensbaby series. Their website says: True to an 1840 design by Joseph Petzval, this lens reveals striking separation between subject and background. Twist 60 is a metal-bodied, non-tilting lens that mounts directly to your camera.

callihan photography, columbus, Indiana photographer

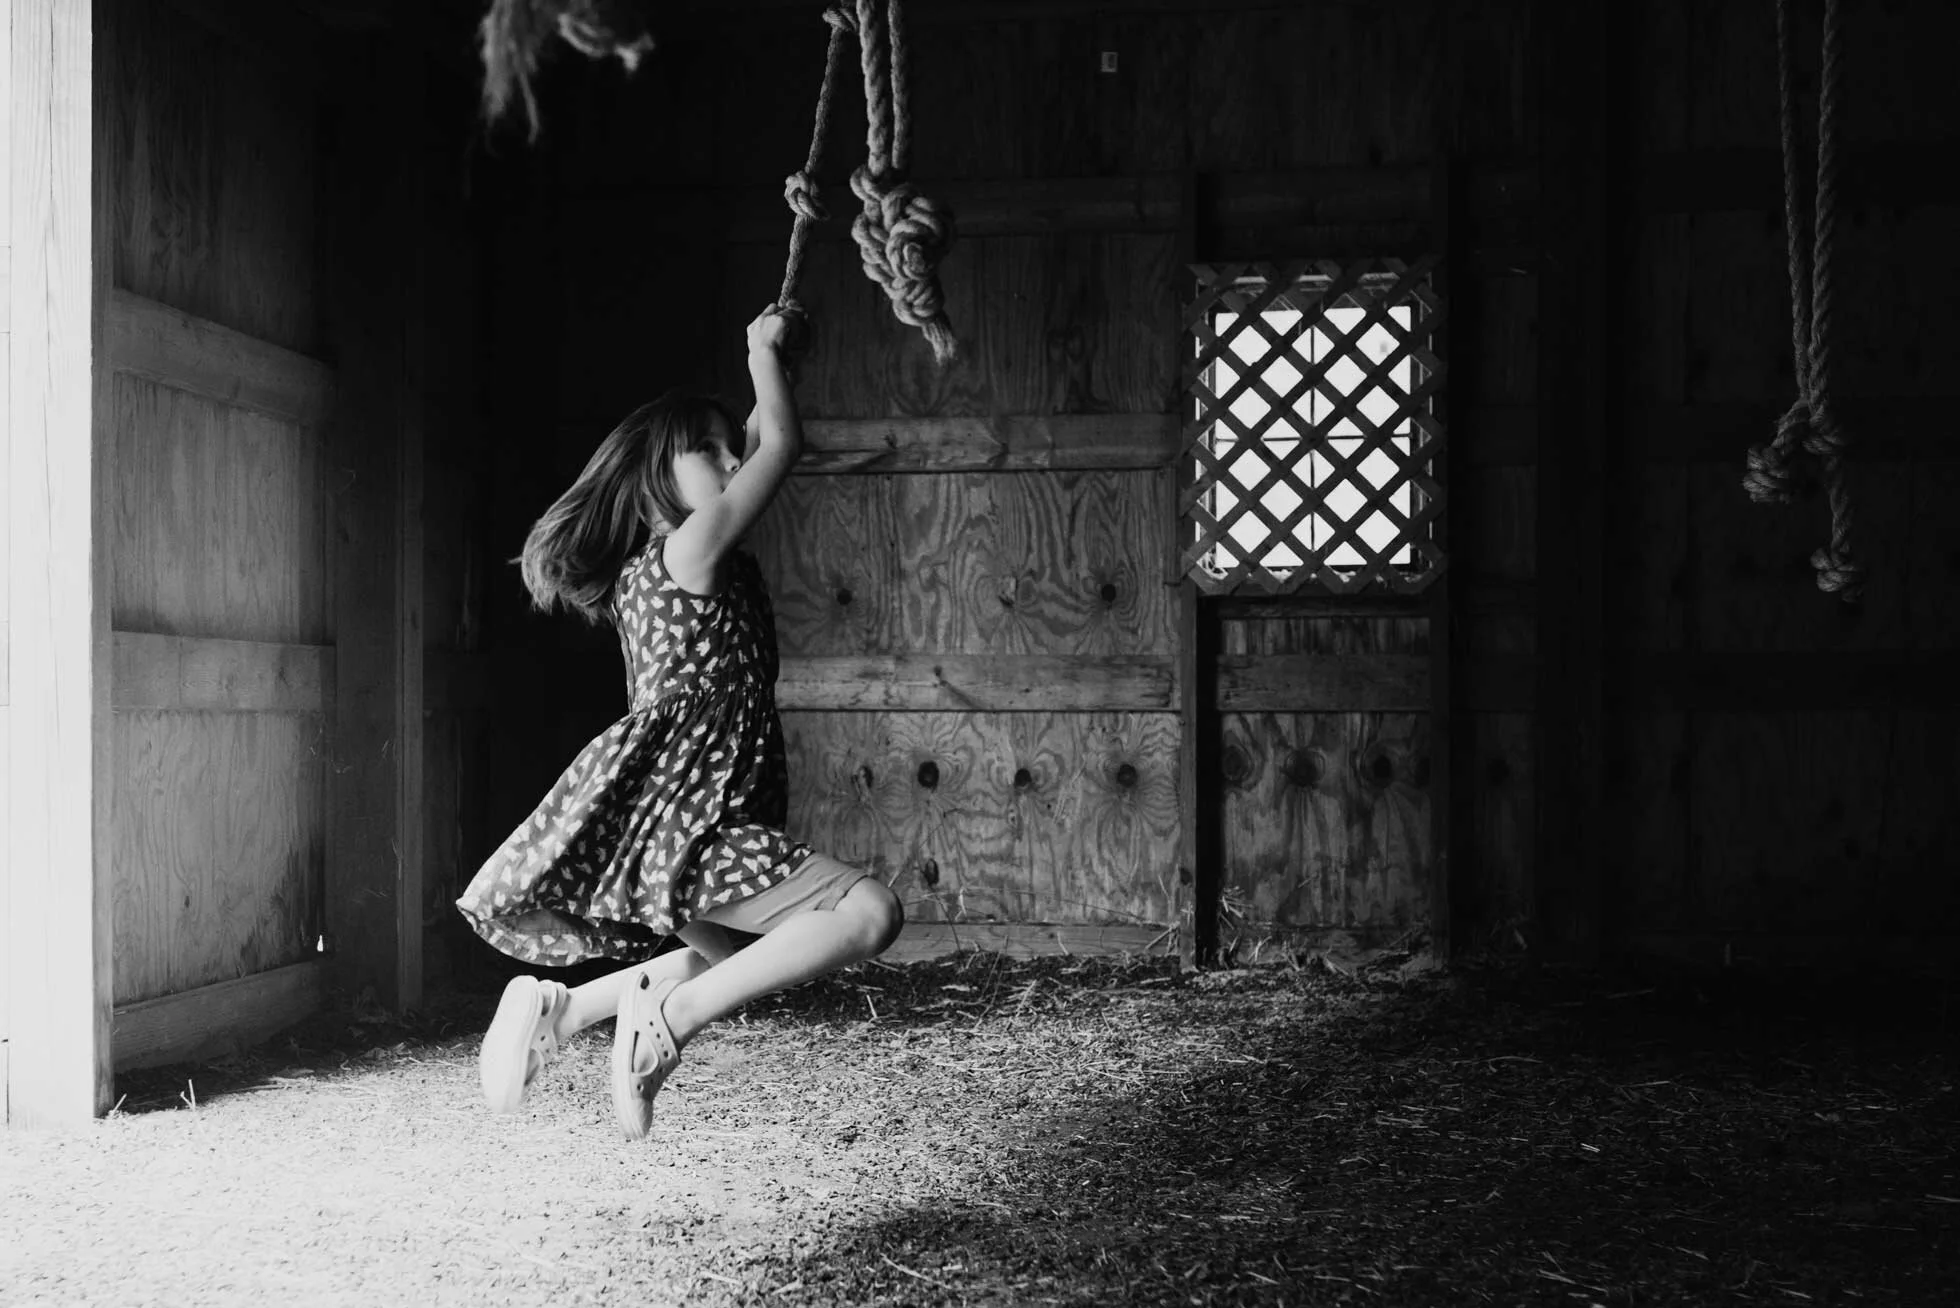
My Lensbaby Twist 60 is one of my favorite lenses to get me out of a creative slump.  It is a 60mm f/2.5 manual focus lens.  This is the most unique lens in my camera bag! It gives a twisty swirl around the edges of photographs.  It naturally gives a vignette when shooting with a wide-open aperture.  So, to me, the photograph has a very vintage feel when used. 

callihan photography, spider web, columbus, indiana

This lens utilizes a central focus. The swirl will be very prominent at wider apertures, but when you close down it is not nearly as noticeable.  It is best to use on a full frame camera, as the central focus point might be too wide on a crop sensor camera.

callihan photography, columbus, IN photographer

I love the lens flare that you can get with the twist 60.  It handles light so differently from my other lenses.  Sometimes you can get nice light leaks, or even a full ring of light flare.  

This lens is not equipped with auto focus, so you must manually set your aperture and focus. It is kind of difficult to use the manual focus. But it helps me to use my sensor in the camera to let me know when I have achieved focus.  This appears as a small dot in the bottom left hand corner of my viewfinder.  So, with some patience, perfect focus is achievable!  With quick moving kids it is really hard! I have to keep reminding my kiddos to SLOW DOWN! (extra bribery is always required, but always worth it, ha!!)         

callihan photography, columbus Indiana

Buy your own: here! And start creating beautiful and unique photos of your own!    

Thanks for reading!


leaves changing into fall, Columbus Indiana photographer, callihan photography

How to do a Levitation Photo

A levitation photo can add a bit of magic to your repertoire! For me, a bit of fine art photography is a nice break from doing regular clean portraits.  This is how I started out doing photography! And it is fun to experiment with.  For this example, I went out early in the morning (which is just a terrible idea for a night person like myself) and took a photo rather quickly.  Since I knew what I wanted to do with this photo it was easy to set up.  I wanted to do a dream like image where I was sleeping and levitating. So, I set up my 3 chairs with my pillow on one end.  I used live view on my camera, set my focus and set the self-timer.  Then I took about 4 photos at a time. Here is my original photo with the chairs:

Levitation image, Callihan photography, columbus, Indiana

Then I took a photo of my pillow.  And then I took a photo of the scene without the chairs.  I made my basic edits in light room and cleaned up things like my shoes sitting off to the side.  Then I brought my three pictures into Photoshop.

the road less traveled, callihan photography, columbus, IN
levitation pillow example, Columbus, IN, callihan photography

I then used the picture without the chairs as my base.  I then selected myself and the chairs and copy and pasted on a new layer. 

callihan photography, columbus, indiana fine art photography

Using a hard brush, I removed the chairs by painting black on a white mask for that layer. I was then stuck with the chair cutting into my pillow.  So, I took the pillow from the other picture, selected it and pasted it on a new layer. I then used this layer to cover up the black chair on the pillow.

columbus, indiana, callihan photography, screen shot

At this point I needed to make the shadow underneath me.  Without the shadow I just looked weirdly lying on the ground.  This is where you need to take note of your light.  Is it soft or hard? Do you have a hard shadow or a soft one? Is there a multiple light source or just one?  As you can see in my picture with the chairs, I have a very soft faint shadow underneath me and I need to recreate that. So, I then made a duplicate layer of myself (without the chairs) and hit CTRL+M for the curves layer.  I blacked it out by pulling the highlights all the way down.  I then used gaussian blur to blur the shadow even more.  Then by using the short cut CTRL+T to transform (and simultaneously clicking the mouse on a corner square and holding down the CTRL key) I skewed the perspective of my shadow to flatten it a bit more.  I then placed it underneath my floating body and set my opacity to 45%.  (The 45% is just what I thought looked about right).  

callihan photography, screen shot, columbus, indiana photographer

At this point it is all artistic license. I enhanced the light to make it a bit hazier. I did this by adding a radial gradient layer. I increased the contrast. I added a texture from I bought from Jessica Drossin. Then I thought it looked a little too yellow and intense and I wanted to give it a more painterly T.C. Steele tone to it.   So I added a hue/saturation layer. 

columbus, indiana photographer, callihan photography, Adobe Photoshop screen shot example

I then thought it looked a little dark so I added a curves layer adjustment.  Two more texture layers from Jessica Drossin to add that painterly texture and feel. (Sometimes adding a texture can make an image come together).  Then I added another Hue/saturation layer to tone some of the yellow out.  Here is my final image:

levitation photo, columbus indiana photographer. callihan photography

If you want to see more fine art images, I highly recommend taking a look at Brooke Shaden.  She does some amazing work! Thanks for reading!    

When to Turn an Image to Black and White

Black and white images are classic! I always include black and white versions in my packages. Sometimes changing an image is a gut feeling for me, and at other times I visualize it first in black and white.  There are good reasons to try it out, and here are some of the things I consider when converting an image to black and white. 

Contrast

Light plays a huge part in creating depth to your black and white photo.  Having a strong contrast can help your image come to life rather than staying flat. I always increase my contrast when working in black and white.  If you are shooting in hard light, or very high or low-key light, black and white might be a good option.

kid swinging, columbus indiana photographer

Simplify

Sometimes you want your focus to be on your subject, but you’ve had a hard time separating them from your background.  In this case it may be a good option to convert to a black and white image.  Changing to black and white can simplify your image and make your point of view easier to understand.  Sometimes the color is just not that interesting, especially if your children are wearing neon! A conversion can really help that situation.

kid in park exploring, columbus indiana photographer, callihan photography

Mood

You can help make an image feel more dramatic and moodier by converting it to black and white. Someone who I think does this really well is Helen Whittle.  She takes images of children and emphasizes their mood and feelings in a way that is just so phenomenal. Lee Jeffries takes photos of homeless people and his black and white images have a very powerful and dramatic feel.  Black and white images are also very timeless.    

black and white noir photo, Columbus Indiana photographer, Callihan photography

Light

A way to really showcase light and texture is by converting it to black and white. Clipping your blacks intentionally will also help add depth.  With hard light color casts can be difficult to deal with. Sometimes it is too hard to get rid of color casts, but you can save a photo by converting it to black and white.  You should try your best to take care of those things first in Photoshop. Correct your white balance and then convert it to see if perhaps it looks better in black and white. This might save you some time.  

child with sparkler, Columbus, Indiana photographers, Callihan photography

Thanks so much for reading!