5 Must have photos for winter

Snowflakes:

It’s finally that time of year when most places have snow! I love taking macro photos of snowflakes. To do this I put on mittens or bring out a sweater and then try to catch the snowflakes. Sometimes the snow is mostly ice, or it’s too warm and melts quickly. I find that those really delicate individual snowflakes are the best if they don’t blow away and you can get the right angle. I find that shooting in f/5-f/8 is the best aperture. That way you can see the full flake. It’s also helpful to get a dark background. I use a pine tree often, as those dark branches help to separate from the snowflake. If you have a macro lens that will work, but I don’t own a macro lens. So, I use extension tubes. This is a much cheaper option than going with a macro lens. It takes some getting used to, but I find it works well.

Urban Settings:

The trees are dead and the landscapes are stark in the winter. I find that this is the perfect time to shoot in city settings. You don’t need the tallest buildings. If your town has a square that would work too! Winter is a great time to practice street photography. Photographing in downtown Columbus, Indiana helps me to look for new textures and locations. Indianapolis has lots of interesting areas as well!

Ice:

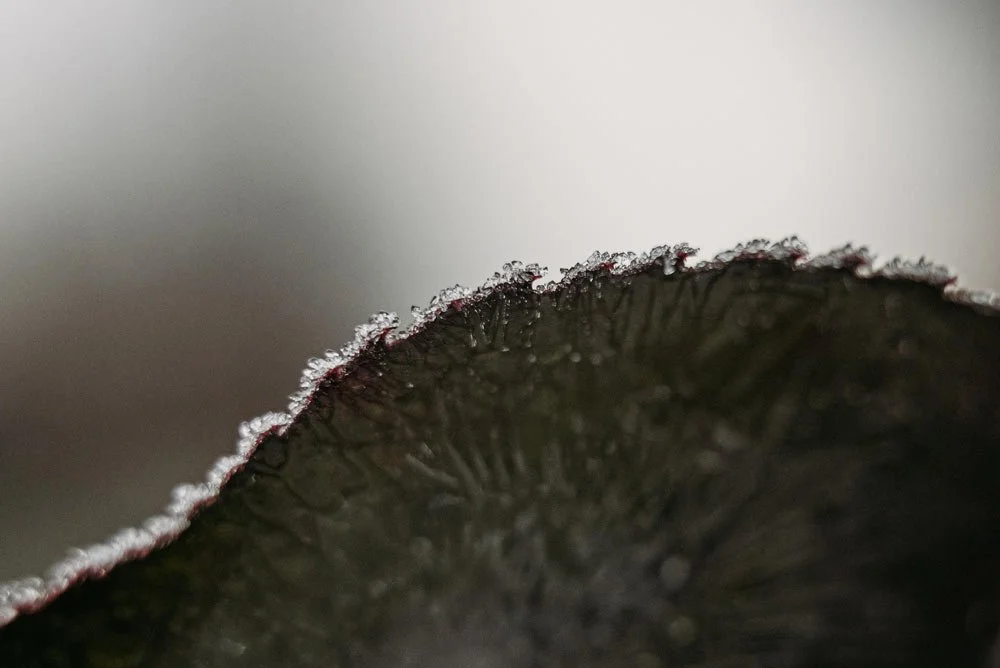
Ice is perhaps my favorite thing to photograph. I love adding cool tones to the ice, especially in addition to warm light. Ice is very interesting, and can come in many forms. See my examples for frozen bubbles, tire tracks in ice, broken ice, leaves frozen in puddles and frost.

Indoor Portraits:

It’s too cold outside to get those beautiful backlit photos! So take it inside and practice with natural light or off camera flash.

Seasonal traditions:

This time of year, if it snows I know I will always have snowmen and hot chocolate to photograph! Christmas is during the winter, so document those lights and the tree and all the festivities. Also, by Valentines day it’s still winter. So you can incorporate those themes in to your photography as well.

Thanks for reading.


5 tips for starting a 365 photography project

It’s that time of year again! I just finished my second year for my 365 project. I have learned so much, and I am happy to report that I only missed 2 days! I thought it would be helpful to go through how I keep my photos organized. This may or may not work for you, but I hope you find it helpful.

Tip 1: Cheat

Most people think that a 365 project is completely overwhelming because you are creating a photo every day. I started out trying to keep to this rigid schedule as well. But this year I have cheated a bit. So here is how I go about this. I shoot generally everyday. Some days I miss, so I will shoot extra the next day or two to catch up and fill in those days that I miss. Some days I shoot one photo. Other days I will shoot around 30 or more. I find myself often filling those days that I miss with macro photos. That way I am keeping the days events actually on the day that they happen. I love macro photos to reflect the season and the environment around the time that I shoot. Some days I just have no energy to try to create an image, or I get sick, or nothing interesting happens and I am uninspired. Some days are just too busy with everyday life! Whatever the case may be, shooting to catch up works for me. It keeps the project flexible and manageable.

Tip 2: Take Notes

I keep ideas on my phone under the note taking section. I will write down what I want to try, or take a screen shot of something that inspires me. Sometimes, I notice something technical I need to work on, and I will focus on that. Also, within my 365 project I might do a personal project. I love the primary colors, so I keep an eye out for them, and when I can get all three colors together I take a photo and file it in my “primary color collection” folder. Other projects to try is a self portrait project, or diptych project, or a black and white project. It’s good to push yourself and try to stay in a creative mindset.

Tip 3: Edit often

When you're shooting everyday the photos can really pile up! Make sure that you are editing as often as you can. Don’t let several months go by without importing and editing your photos. I like to edit once a week. If I have photographed something that I am really excited about then I will edit it even sooner. I edit more than I will use. Then I pick my favorite photo of the day and put it in the 365 project photo folder. Which leads me to my next tip:

Tip 4: Stay Organized

How I Organize my photos. So I live in Columbus, Indiana. And here in the Midwest we have a four distinct seasons. So if I go through my photos, I can generally tell around what time of year they were taken. I start a folder and label it for the year. Then within that folder I have 4 other folders. A winter, spring, summer and fall folder. I don’t have strict dates that I go by. I usually just go by the weather, so it’s not exact, but it is organized enough to where I can find specific photos. I keep most of the meta data on my files so that when I export them I will at least have the date and my camera settings. Then I make a folder titled 365 project (with my year folder). I then take my favorites from each day and copy them into this folder. Then I rename the file with the date. For example, today’s would be 1-11-22. I know others like to keep a separate folder right there in Lightroom. That doesn’t work for me, but maybe it will work for you!

So in summary: Create new folder>2022>Winter/Spring/Summer/Fall/365 project.

Tip 5: Reward yourself at the end

Print your photos!! The last two years I have used chatbooks to print a small book. It is my reward for the year, and I love it. I have looked at my photos often. I can see so many changes in my house, and in my kids, and in my photography style. Others I know have used blurb. You can export from Lightroom directly into blurb books! You can find out how to do this here. I had trouble with this so I used chatbooks instead and have been happy with them ever since! It’s also important to share your work! This keeps you accountable and motivated. I have a monthly calendar template in Photoshop that I can bring my photos into for each day. I then save it as a jpeg and share it with friends and family. You could share it on Instagram, or to a local photography forum. Click Community has a forum thread where members share their 365 project daily.

Monthly sharing template example

Enjoy some of my favorites from this year! Thanks for reading!

Why You Should Create Self-Portraits

Creating artwork every day is HARD! I know I fail at this often. Life just gets busy and your camera is too far away. Like upstairs.  (I’m obviously speaking from experience, Ha!) The question is why should you create a self-portrait? Answer: Lots of reasons! 

blue-and-red-self-portrait-by-callihan-photo.jpg

Sometimes you need a cheap model to practice. 

That’s the truth! It’s hard to keep asking the people in your life to take their picture.  It wears them out, and it’s good for you to get yourself in front of the camera every once in a while. It’s also important to express yourself as an artist.  I know many photographers who are great at self-portraits. (Go here or here for an example.)  They use it to work through what they are feeling and experiencing.  It is important to stay inspired.  In order to stay inspired you can take a walk, draw, paint, try a new skill.  I like to try to recreate paintings or various artwork through photography.  For example: I used the painting by
Philip Alexius de László as my inspiration for the following photo.  

laszlo-portrait-painting.jpg
self-portait-13-laszlo-inspiration.jpg

For this next one I used a painting by Edward Hopper.

hopper.jpg
hopper-inspiration-self-portrait.jpg

Modeling in front of the camera helps you to sympathize with your subjects in your business and personal work.

Modeling is hard work. And when you get in front of the camera you will see just how hard it is.  Being able to move your own body in a way that translates into a good photo will help you direct your subject to carry out your vision when you’re behind the camera.  This is no easy feat! I know I am way more comfortable behind the camera rather than in front of it.  And now that I know that I can help my subject feel at ease.  Take notice if you are more comfortable looking away from the camera or straight at it.  I am a bit of an introvert, and I tend to like the ones where I am not looking right at the camera.  I am certainly more comfortable pretending the camera is not there!  Maybe that will translate to your introverted subject.   

self-portrait-by-callihan-photography.jpg

Getting in the frame is important for you as a photographer too! 

Often times we as photographers are missing from all of the family photographs.  It is important to get yourself in the frame, to document those moments with your kids and to just show who you are/were. Someone who does this beautifully is Meg Loeks.  She makes it a point to always take a self portrait on her birthday, and she is always getting in the frame with her kids.  Try not to be intimidated by her level of talent!  Your kids are going to want to see you in the photograph, not just endless pictures of themselves.  (Although, that can be fun too.) Remember a self-portrait can simply include the details.  It doesn’t have to be your face necessarily.

tulips-and-shoes-by-callihan-photo.jpg

How to do it:

I use the Nikon app on my phone called WMU. For Nikon you can find it here.  For Canon go here. It is very handy for cameras that have the wireless feature.  To turn on your wireless connection on your camera go to the set-up menu (the wrench icon) > Wi-Fi> Network connection>Enable.  Then use your phone to connect to your camera’s Wi-Fi. Then you can open your app, and you can choose to take pictures or view them.  Your battery must be charged to use this feature.  Using the app allows me to set the focus, which is perfect when you are using a shallow depth of field (wide aperture).  You can also use the self-timer.  You can choose however many photos you want at a time.  For this option, I have found it better to close down your aperture, for a wider depth of field.  It’s also good to set your focus with a stand in object, and then switch your lens to manual.  That way it doesn’t try to refocus when you walk in front of it, and you lose the focus all together.  If you don’t have a fancy digital camera, then just use the self-timer on your phone! Lastly, embrace the imperfections! Sometimes, you’ll have a whole set that is blurry.  But now is a good time to experiment. Remember, no one has to see them if you don’t want them to!

blurry-portrait-callihan-photography.jpg

I hope you found this helpful! Thanks for reading.