How to Photograph a Silhouette

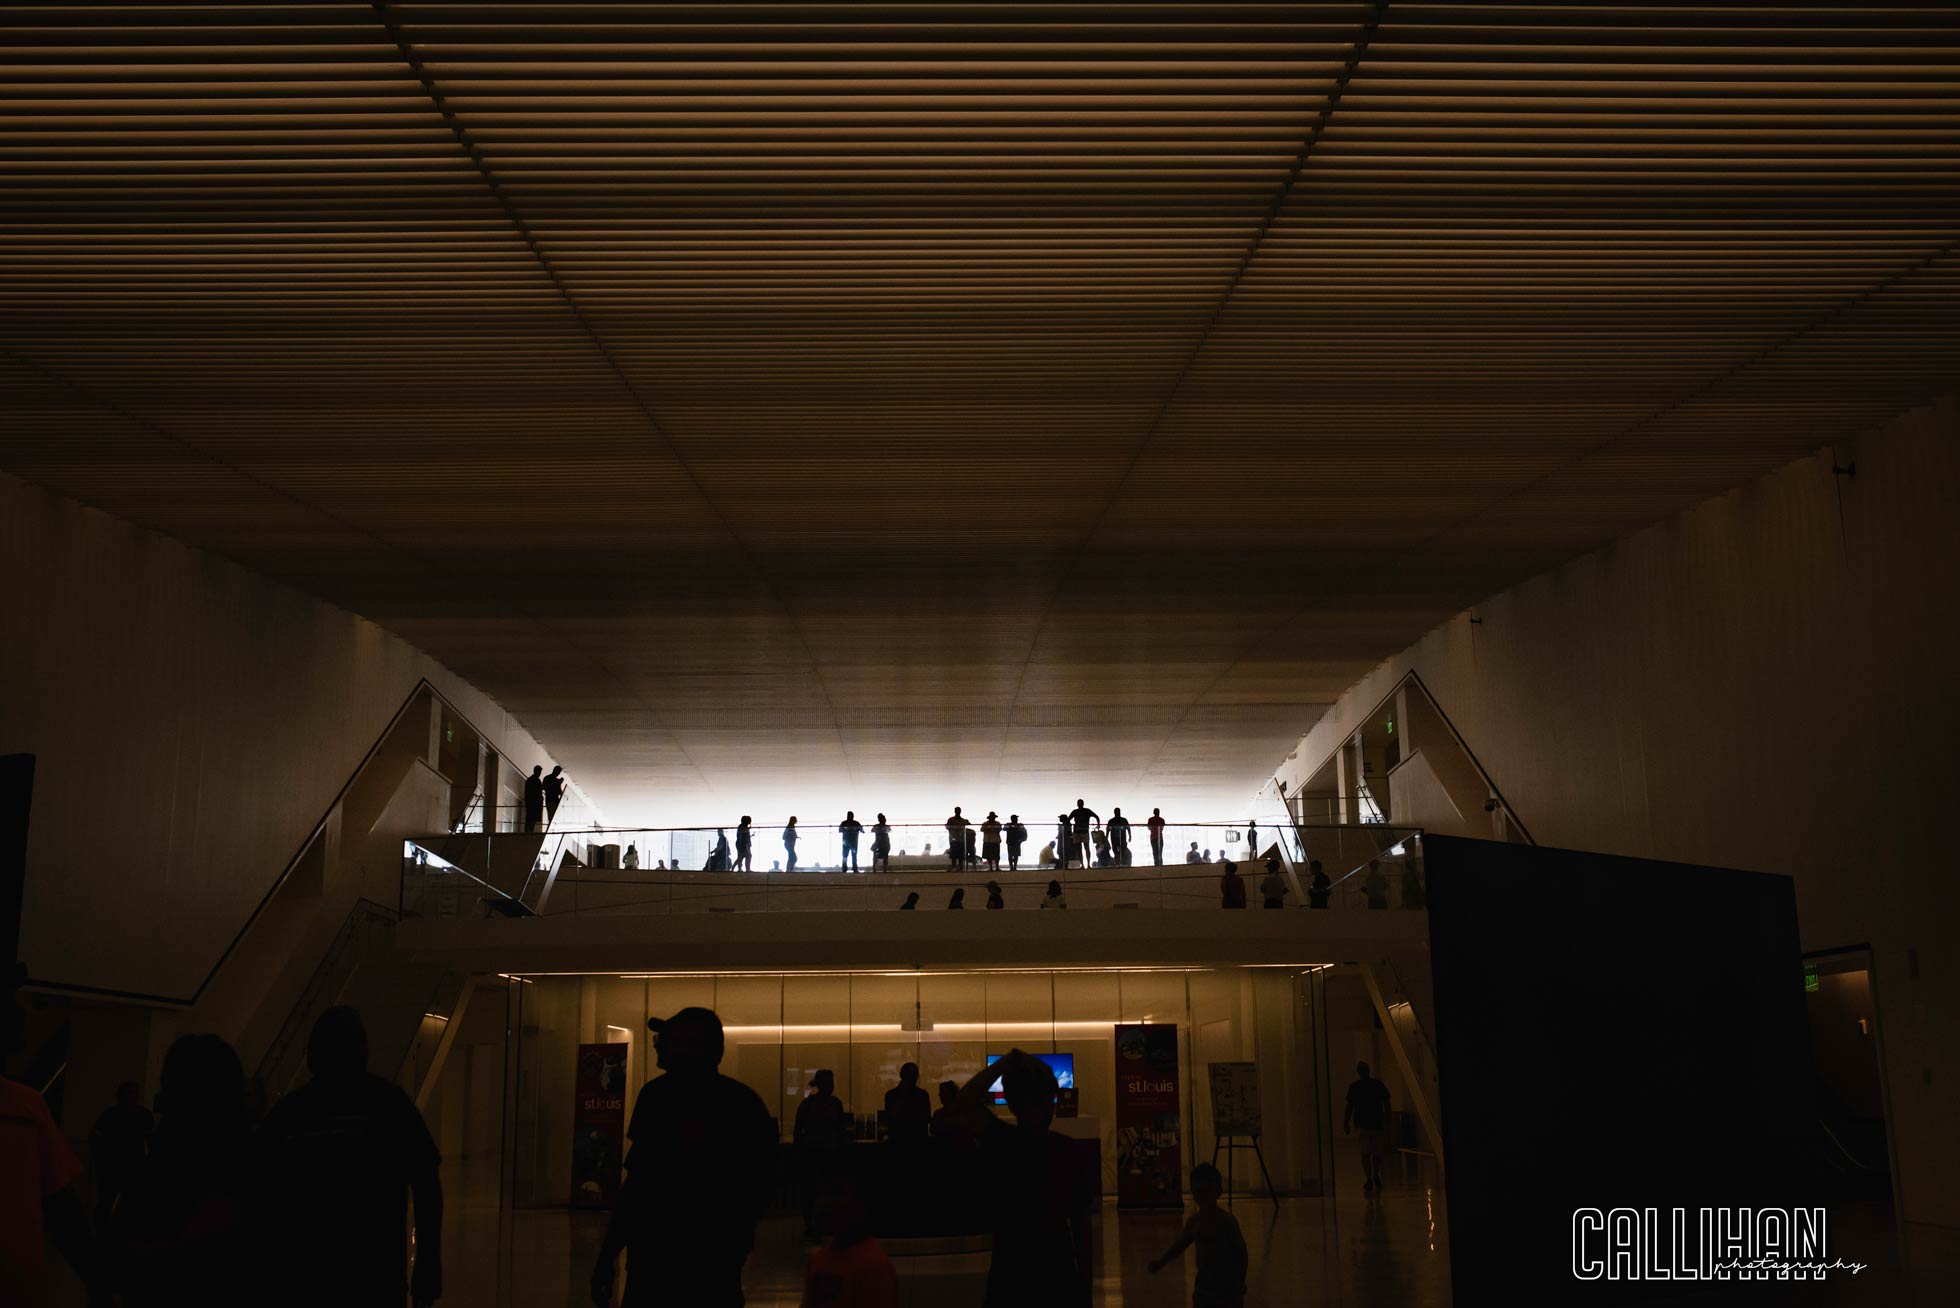
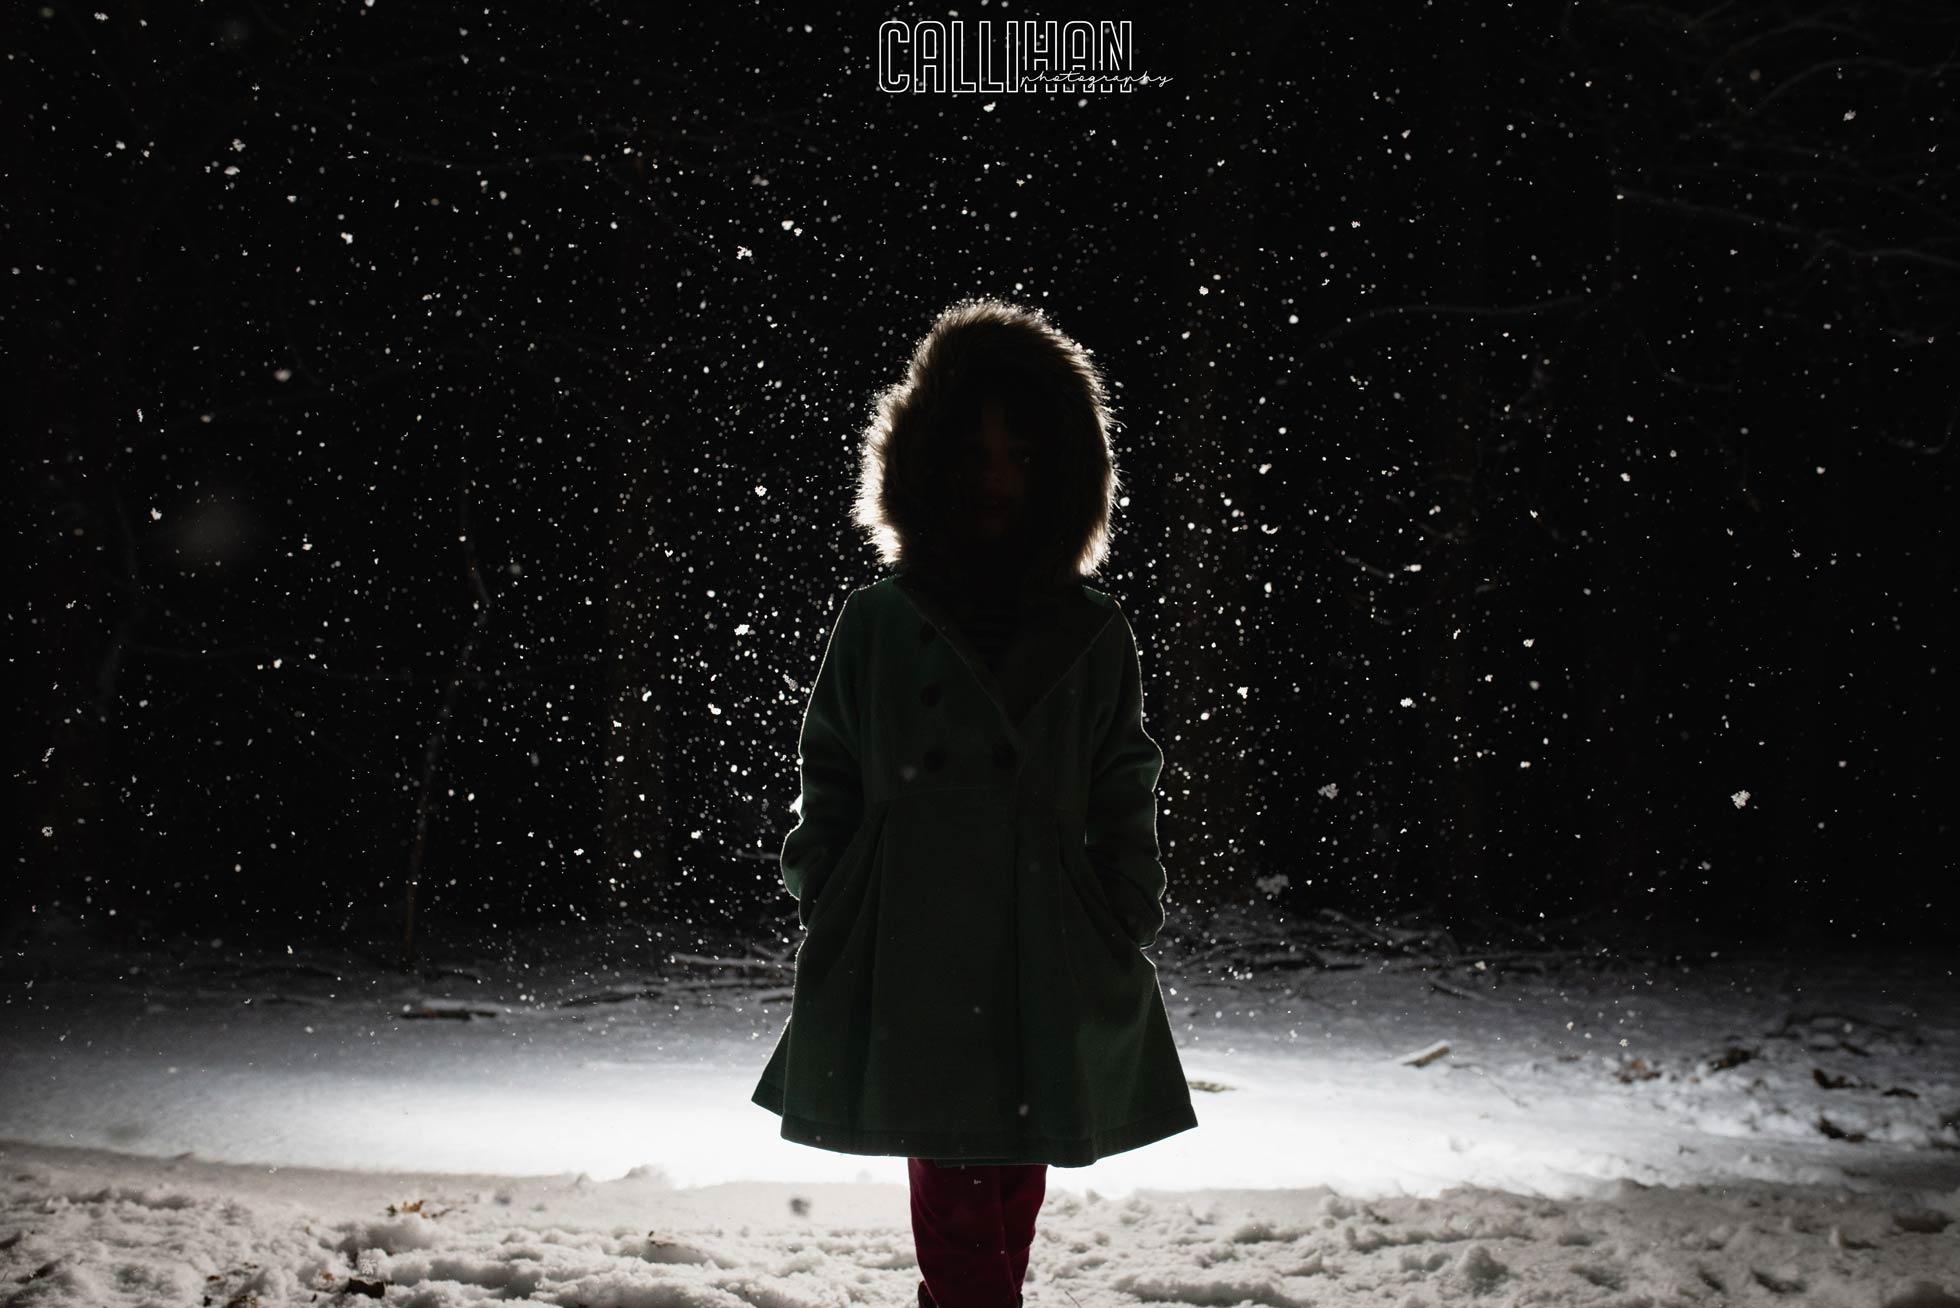
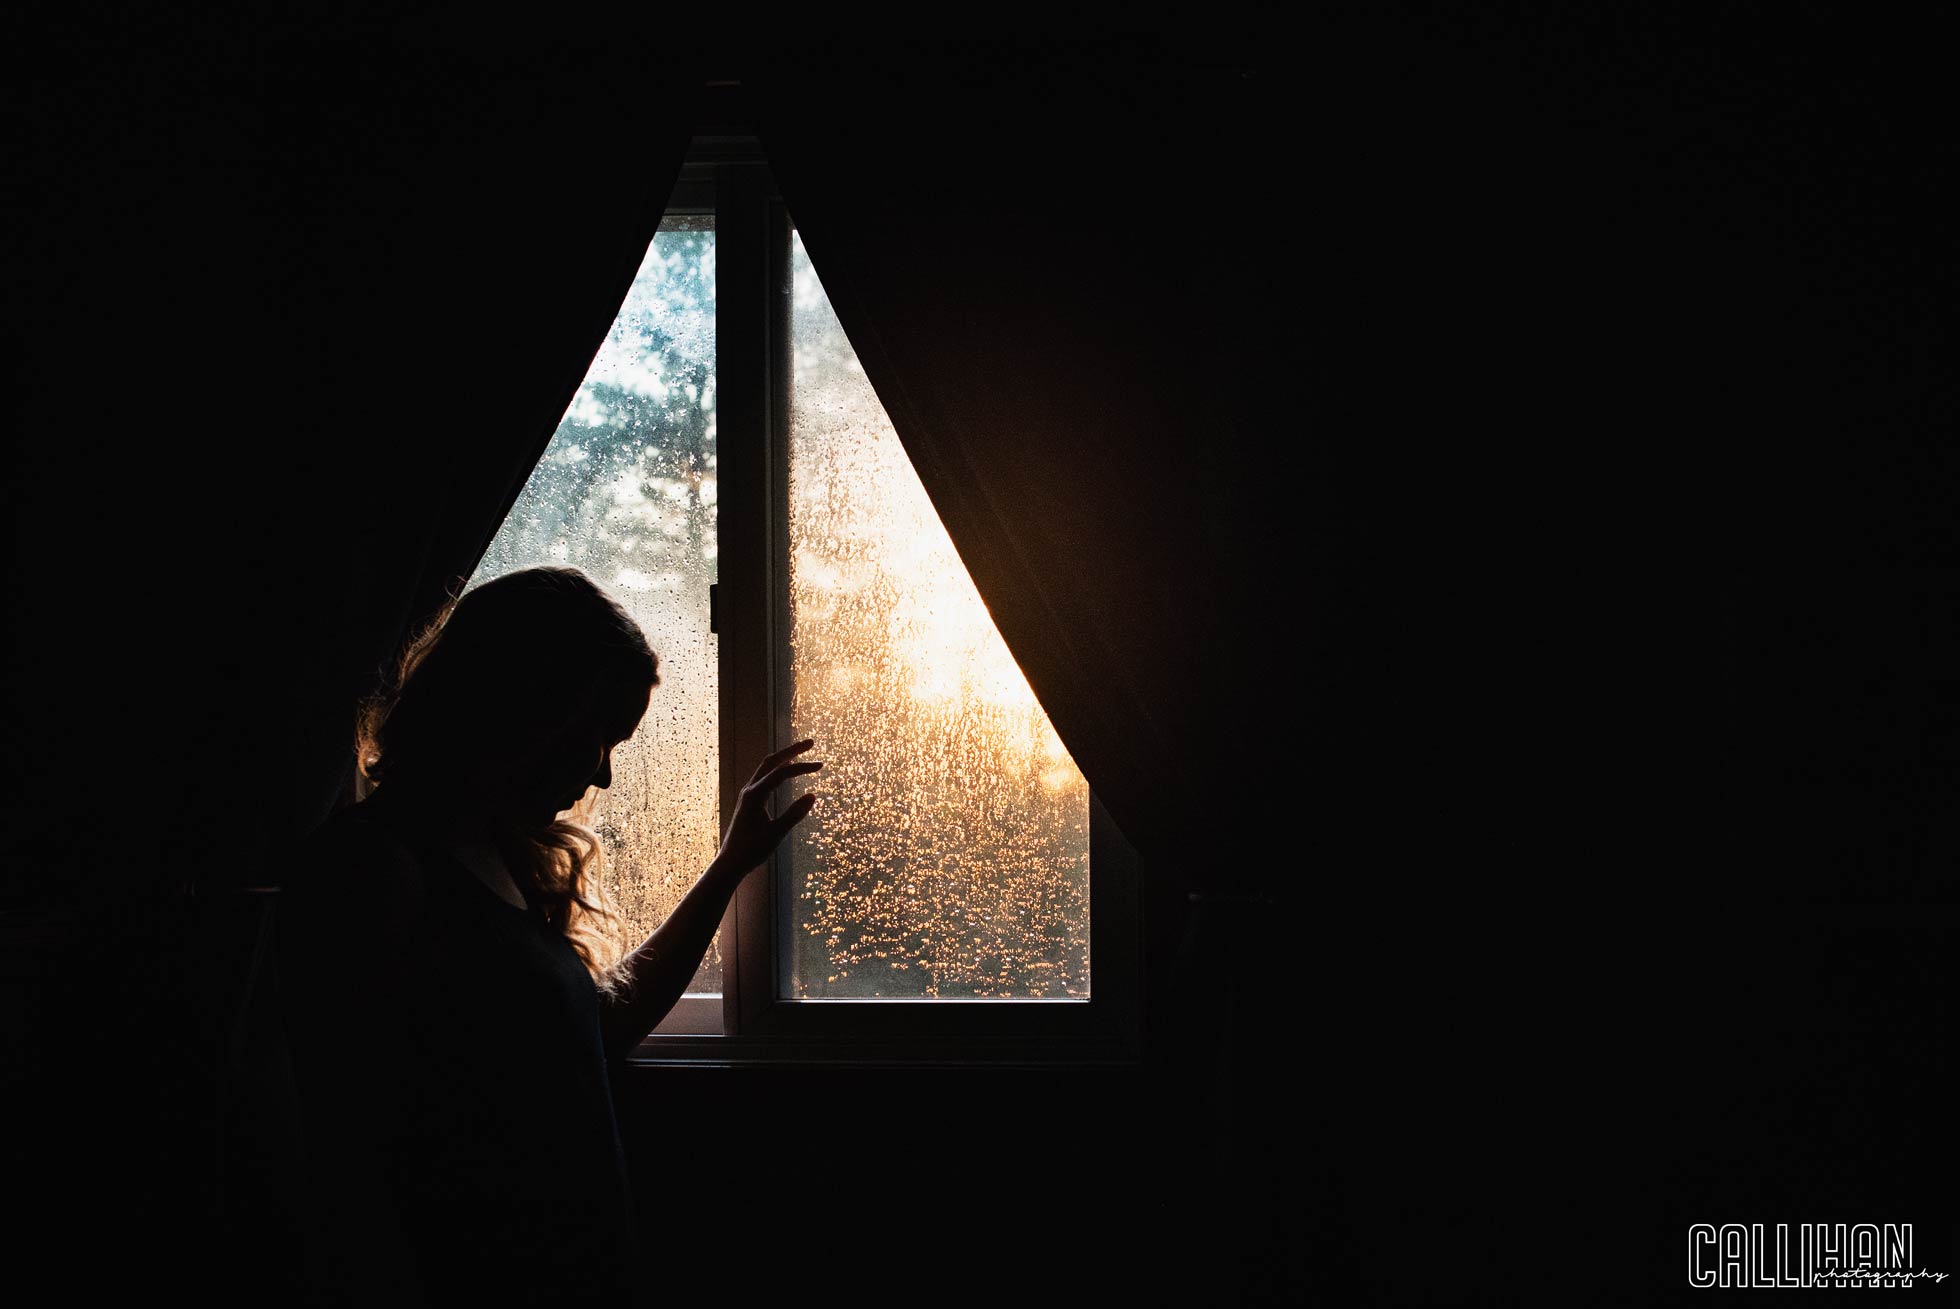
A silhouette is where your subject is mostly or completely dark and the light behind the subject is exposed correctly. Silhouettes are very easy to photograph.  

silhouette, by Columbus, Indiana Photographer, Callihan Photography

First, put your camera in Manual mode if you haven’t already done so.  This will help you to expose behind your subject rather than for your subject. If you are in automatic mode, make sure your flash is turned off.  

silhouette, by family photographer, in Columbus, Indiana, Callihan Photography

Next you need to place your subject with light behind them.  This can be a sky or if you are looking out from a building, cave or alleyway that will work too.  You will just need light behind them. Then expose properly for the light behind them.  If you are in auto mode you will want to point the camera at the brightest part of your picture, so it will meter for your light source rather than your subject. This will severely underexpose your subject.  Which is exactly what you want.  When looking through your viewfinder or on your screen if you are in live view mode, you will want to check your light meter.  Make sure it is reading 0, and you are not blowing out the sky or light source.  You can get away with underexposing quite a bit as long as you are not losing detail in your sky.

silhouette, by Columbus, Indiana photographer, Callihan photography

There are a few things to think about.  It helps to have a recognizable shape.  So, if you are photographing a person it helps if their limbs are visible.  The simpler the better! Don’t be afraid to increase the contrast in post processing.  You can even play around with the colors that you have captured to make your silhouettes stand out even more.  It helps to shoot in raw to really bring out those details. 
Try it out! This simple technique can really give you new possibilities with your photography.

cow silhouette, by Columbus, Indiana Photographer, Callihan Photography

Thanks for reading.

How I use Frequency Separation for Skin

I love using frequency separation for skin because you can take care of shadows or inconsistent skin tones without over smoothing or over processing. No one wants plastic skin!! This technique separates the color from the texture, allowing you to adjust the tones, and imperfections.  For my example I am using a picture of my nephew.  And while his sweet little baby skin is PERFECT, he does have a little stork bite right in the middle of his forehead, and some tiny tiny bumps.  Using frequency separation is the perfect tool for taking care of this.

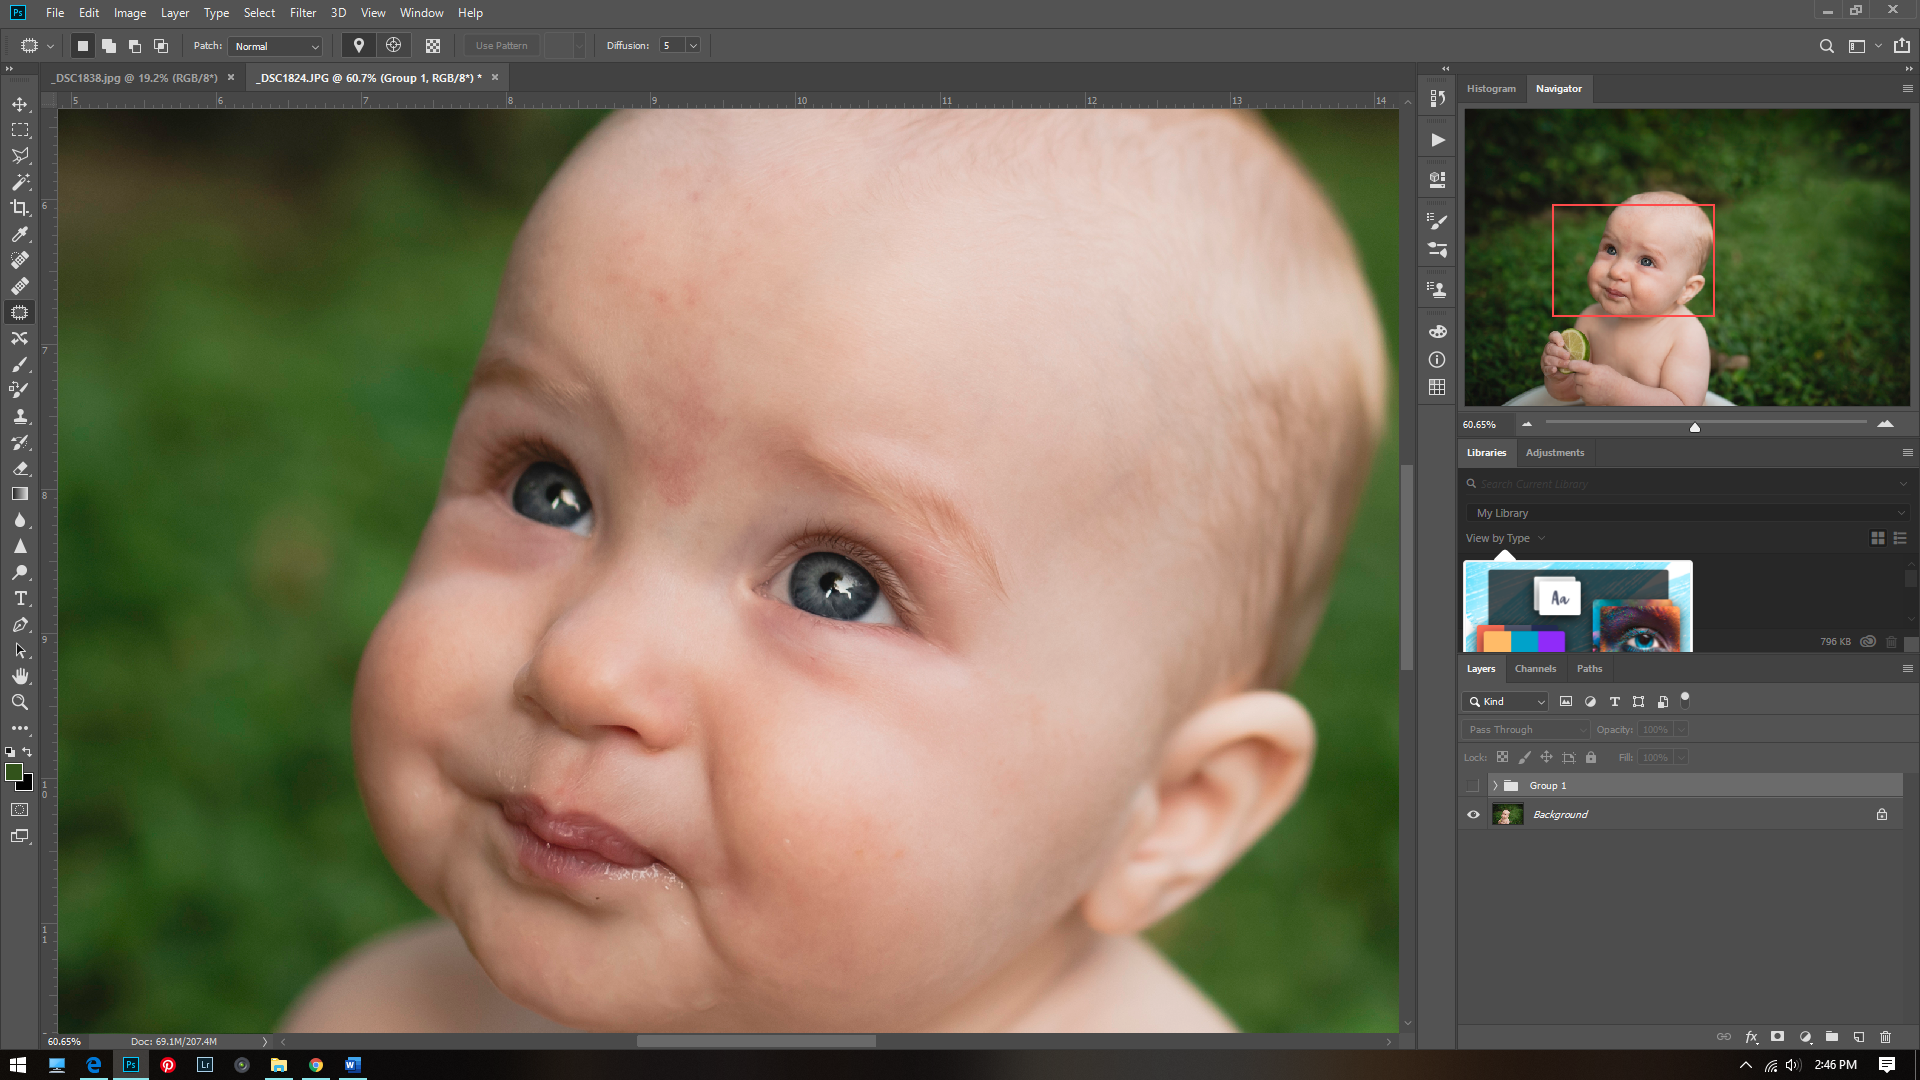
Here is my image before:

cute baby before editing image, Callihan photography

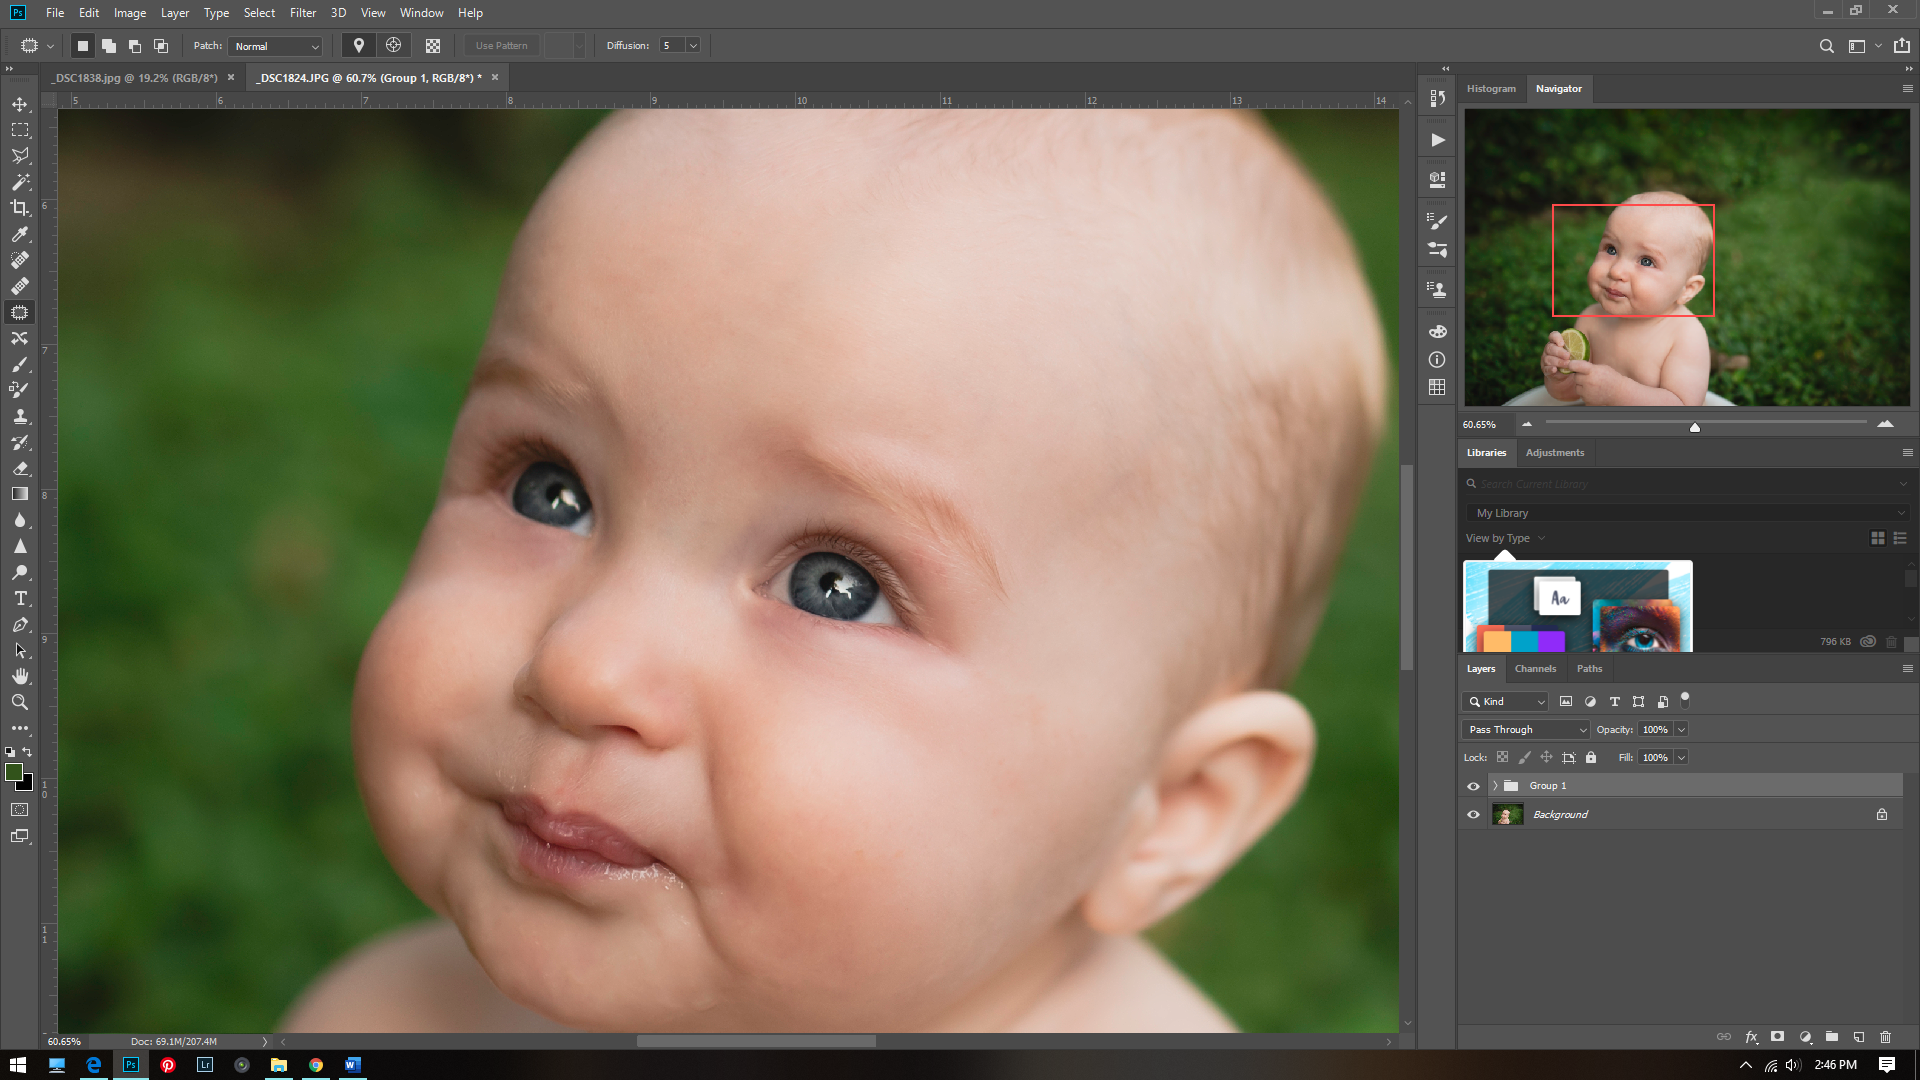
And here is the final image:

final image, Columbus, Indiana Family and child photographer, Callihan photography

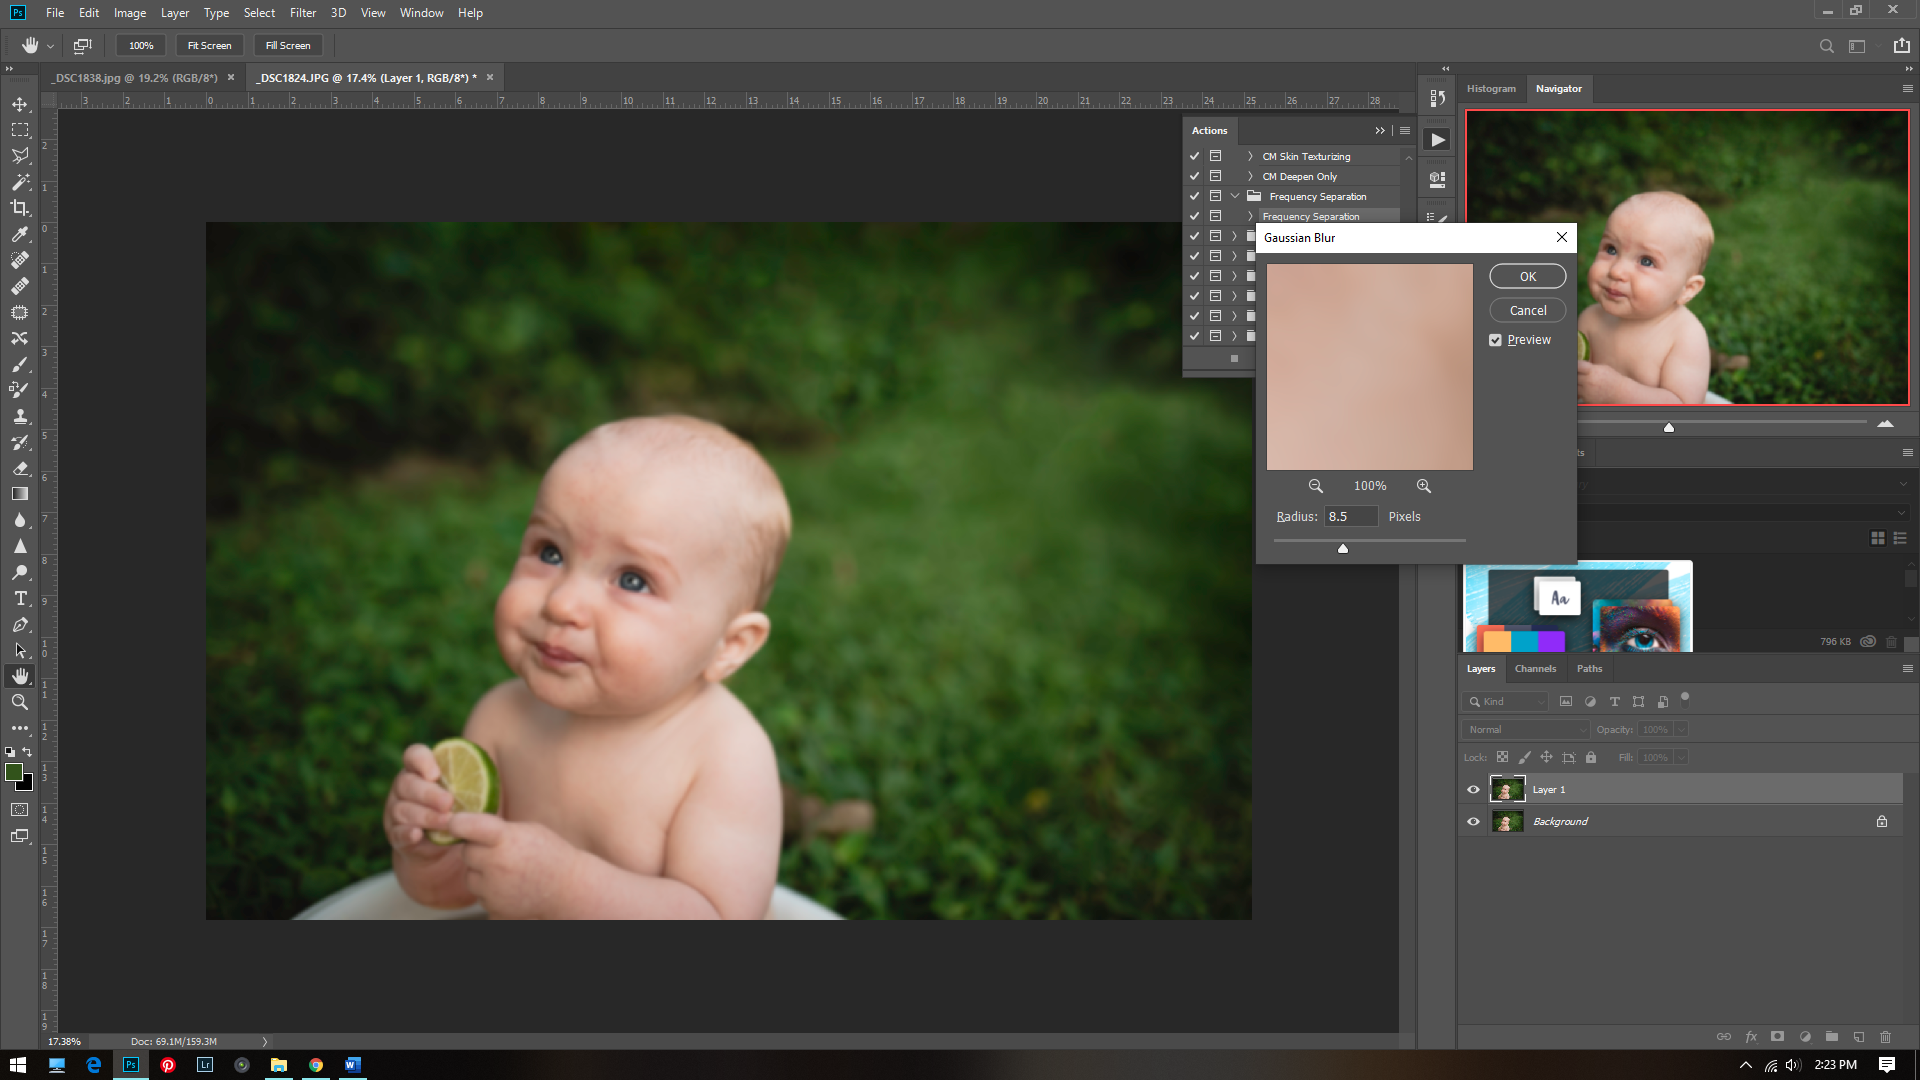
After making my normal adjustments I start by making 2 virtual copies of my image using ctrl+j. I rename one layer high and one layer low.  Put them in a group folder. I then use a Gaussian blur over the lower layer and set the radius around 8. This may vary.  

Columbus, Indiana family and child photographer, Callihan Photography Photoshop example

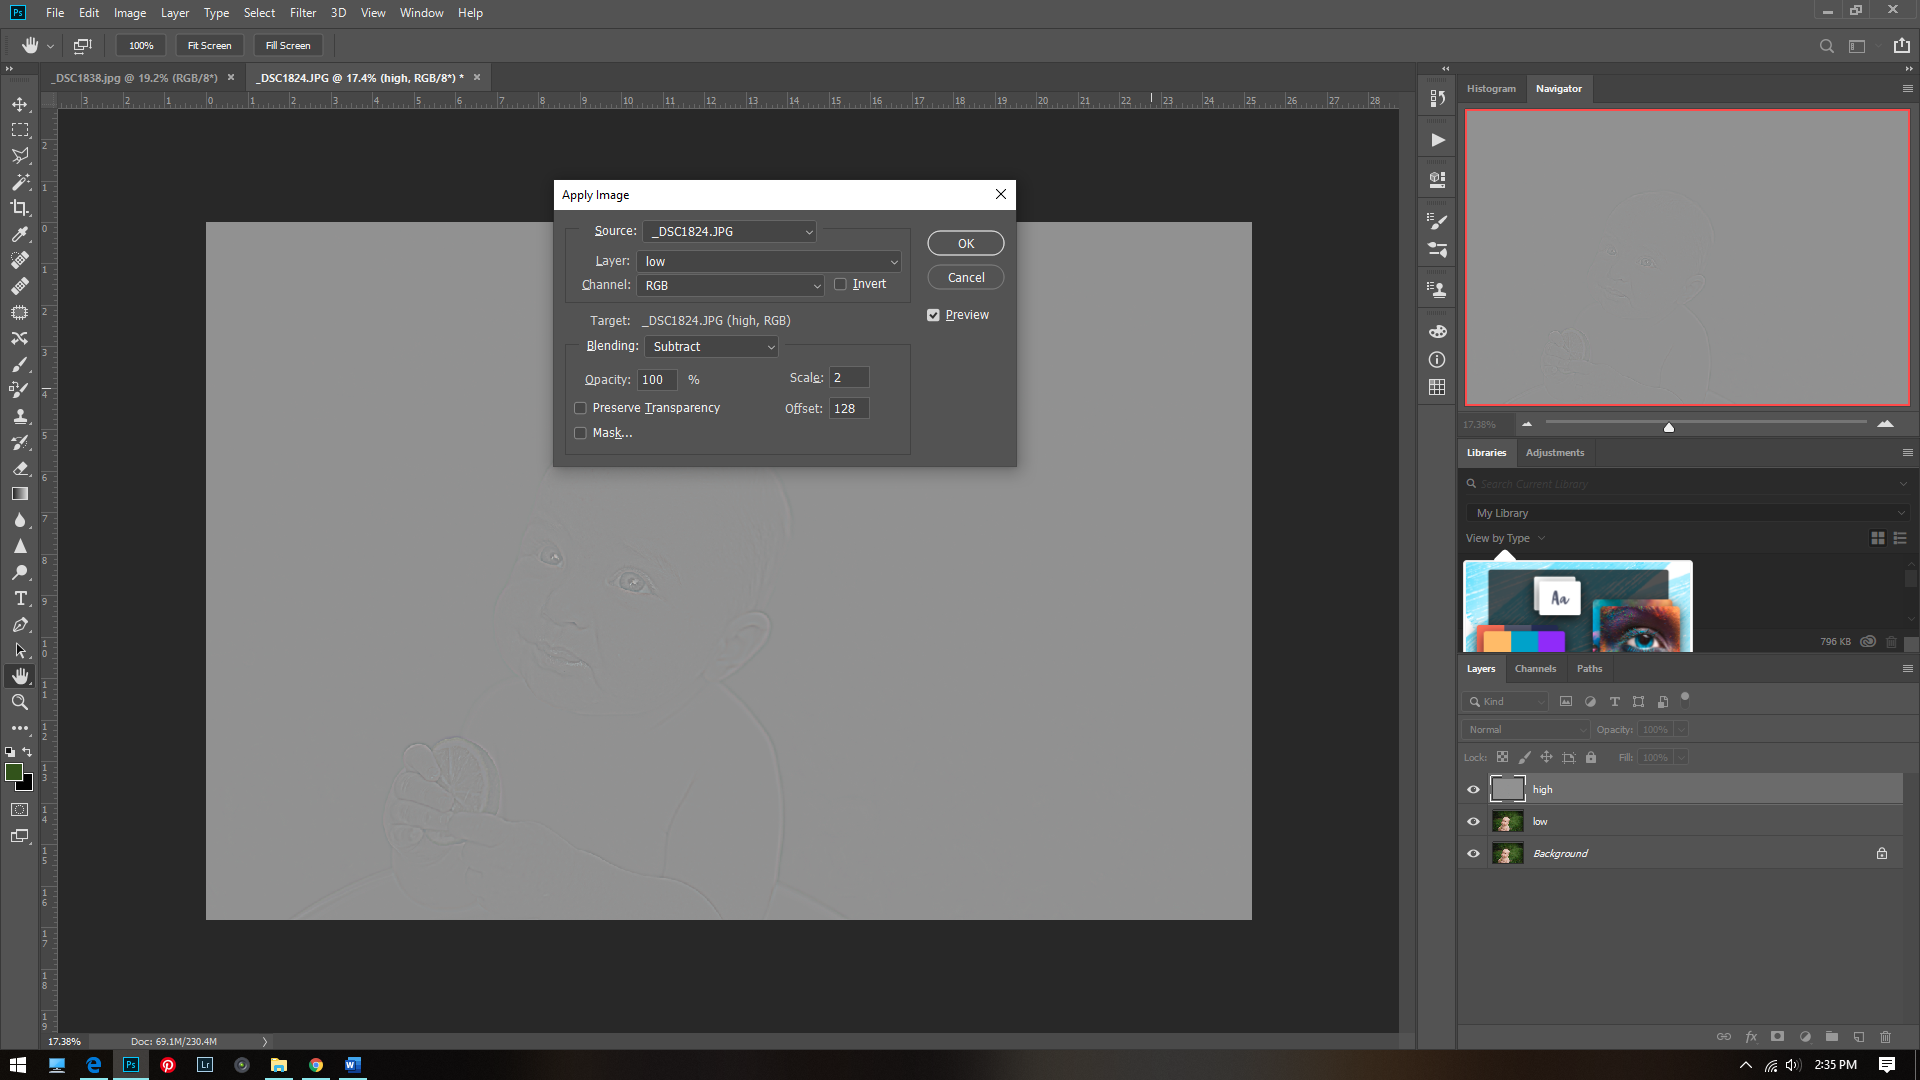
For my top layer I use  Image>apply Image. Then set the layer to Low, and the channel to RGB. Set the blending to Subtract, and the scale to 2, and the offset to 128. Set this layer to linear light.

Photoshop example for frequency separation, Columbus, Indiana Photographer, Callihan photography

For the next part I like to turn off the high layer and look for red patches or inconsistent colors.  I then use the patch tool (the shortcut is j).  I then go around all the places I see inconsistencies and correct them with the patch tool.

fixing inconsistent skin tones with frequency separation

I then turn the high layer back on and use the patch tool on it to correct any tiny bumps, or rough skin.

And there you have it! Here is the before:

before image screen shot, Columbus, Indiana photographer, photoshop example

And the after:

correcting skin tones example in adobe photoshop, Columbus, Indiana Photographer

It is subtle adjustments like this that can make a big difference.  Frequency separation works well for acne, undereye circles, birthmarks, weird shadows, basically all skin issues!! Phlearn has an excellent Photoshop action for frequency separation you can purchase here.

Here’s just a few more from this adorable session.

 Thanks for reading!!

Why I love photography

1. I need time to slow down.  I honestly think this is the reason everyone initially gets into photography. Photographers have a compulsive need to preserve time.  We feel it slipping away and life is like a vapor.  Here one minute and gone the next.  Time only keeps speeding up and I want to remember, document and cherish every detail.  Time is precious, and it feels like the older I get the more quickly time passes by.  Things change and happen so fast!  Sometimes I feel like I’m hurtling through life.  I love the slow days.  I love time to think and create.  Photography helps me to do that.   

Newborn and mother picture, Columbus, Indiana Newborn photographer

2. I love the technical and artistic challenge.  Guys, you have no idea how short my attention span is.  I love art, and have always loved art.  But I get tired of different mediums rather quickly.  I have plowed my way through learning ink, watercolor, pencil, charcoal, oil paint, oil and chalk pastels, sculpting, woodburning, hand lettering, calligraphy, acrylic paint, marblizing and making paper, collage, cooking, sewing, poetry- you name it! Photography has kept my focus for soooo long.  And that is because the possibilities are endless!  From editing, to film, to getting things technically right straight out of camera, from learning my settings and gear.  It is a gold mine of endless learning!!!!! Photography is such a good fit for me.  Since I have an automotive background, I love the technical aspect of photography.  Since I am an artist, I also love the control and artistic view you can infuse into every photograph.  Since I am somewhat of a perfectionist, I can work hard to achieve a perfectly exposed photo in camera every time.  I love learning and trying new things, and I have yet to reach any exhaustive point with photography and I have been actively absorbing everything I can for at least five years.    

Bride, Columbus, Indiana wedding photographer

 3.  I love observing people.  Photography has helped me to become more thoughtful and observant.  It has also helped me to consider how I can become a better visual storyteller.  I love unique quirks and small ticks.  I love seeing different personalities. I love expressing myself through photography in a way that will honor the person I am photographing, and best tell their story. 

Child at play, Columbus, Indiana child and family photographer

 4. I feel that it is an important craft to learn.  Photography has been around and changed a lot in its lifetime.  There are skills to be learned from photography.  I think it is important to see beauty in the mundane.  I think it’s important to study the masters.  Learning photography has improved my ability to see light.  It has improved my ability to capture dynamic skin tones when I paint. It has taught me to look for design and composition in everything.  I can see things in a new way, and it has sparked my curiosity about the world.    

Self Portrait, blog why I love Photography, portrait photographer, Columbus, Indiana

 Thanks for reading!!!