
What is a double exposure? It is a technique that layers two different exposures on a single image, combining two photographs into one.
There are 3 different ways to do a double exposure. The first is with a digital camera. You can achieve this in camera. For Nikon you would go to the photo shooting menu (which is the camera icon in your menu). From there you would select the multiple exposure mode. Arrow down to select the number of shots you want to combine. Then select multiple exposure and arrow through to turn on for a single photo or series. When you take your first photo there will be a symbol of overlapping squares at the top of your photo on the LCD screen. Then take another and it will combine them for you! For me personally, I have added this multiple exposure option to the “my menu” feature on my Nikon D750. That way it is easily accessible. On a Canon it is very similar. You would use the dial to turn across to “multiple exposure” and click “set.” You will then have several sub menus options. This article here explains better on how to do it on a Canon.

The second option is if you shoot film. Some film cameras allow you to do this, and some do not. With film I believe you generally try to overexpose, but with double exposures it is best to underexpose. It might take some getting used to. To create the double exposure, you will want to expose the same frame more than one time. Google it to see if your film camera has this capability and read more about shooting double exposures on film here.


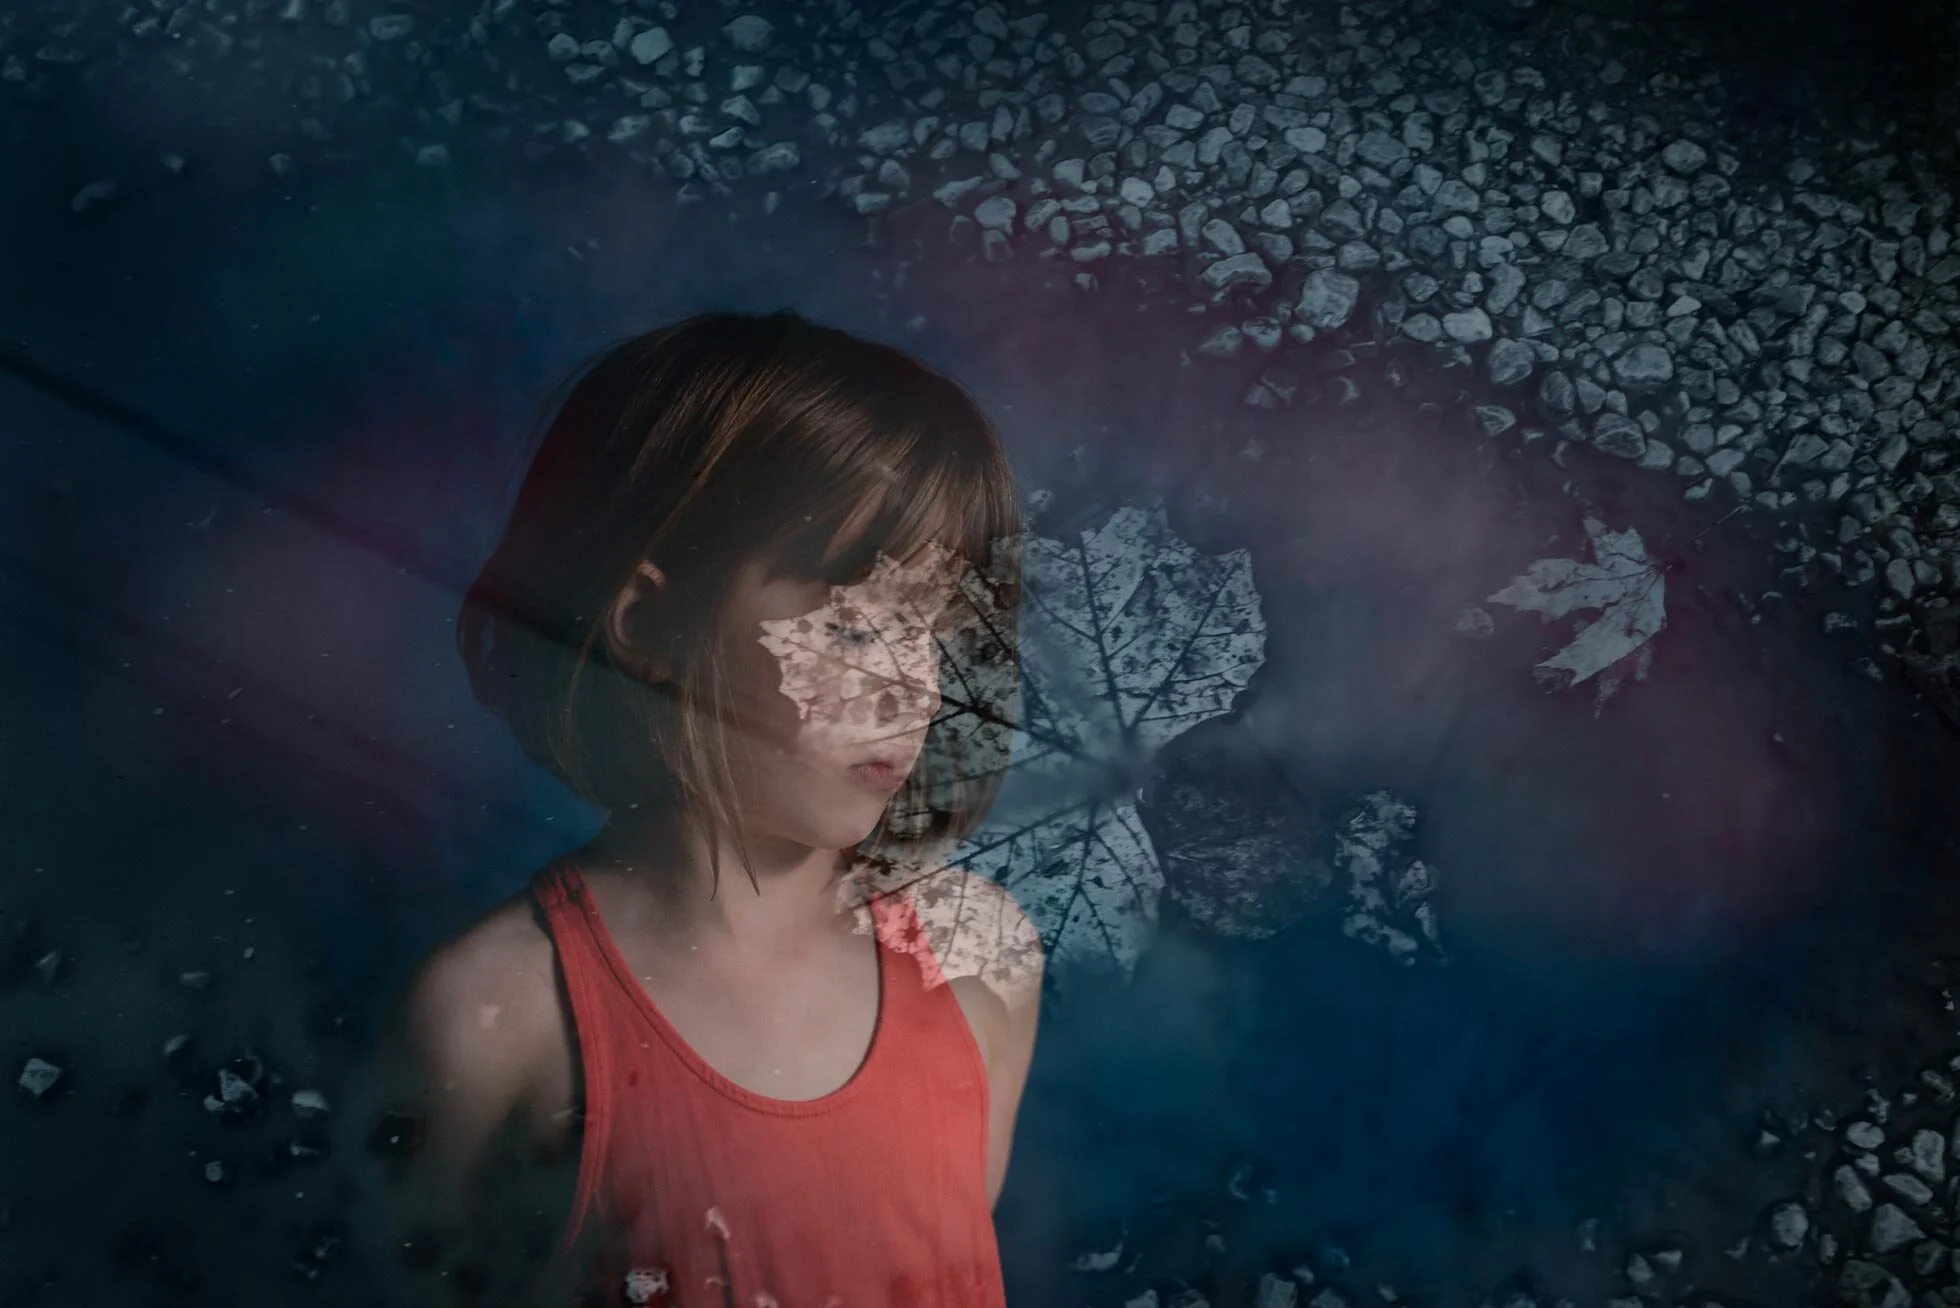
The third way is to do it in Photoshop. Choose the photos that you think will layer nicely. For my example I have used a puddle with a leaf in it and a portrait. Open them in Photoshop and put one layer over the other. Then adjust the opacity. I have then masked off the areas of her face that I want to show through and have more detail. I did this by adding a layer mask to my overlaying puddle photo. I then paint with a soft black brush to let the lower portrait layer show through. I then brought in more color by adding a blue gradient layer. I then masked off the areas I didn’t want the gradient layer to affect. I then added some paint on a new layer to add depth and more of the orange color. I set it to pin light according to my preference and lowered the opacity. And there you have it! Adobe has a great tutorial here.
It’s easy to do, but to be successful compositionally it can be quite difficult. With a double exposure the shadows of your first frame will be filled in by the light parts of your second frame. So, it’s best to try to visualize what you want it to look like. Though it can be very hit and miss. It’s something worth experimenting with. Sometimes overexposing or underexposing can help you clearly define the double exposure. If you want to see an outline of your subject place your subject against a blank background.


Thanks for reading!